
These Candy Cane Cookies combine melt-in-your-mouth buttery shortbread with a hint of peppermint, all wrapped in a swirled red-and-white ring that looks just as festive as it tastes. They’re tender, slightly crumbly, and have just enough sweetness to pair perfectly with a mug of hot cocoa or eggnog.
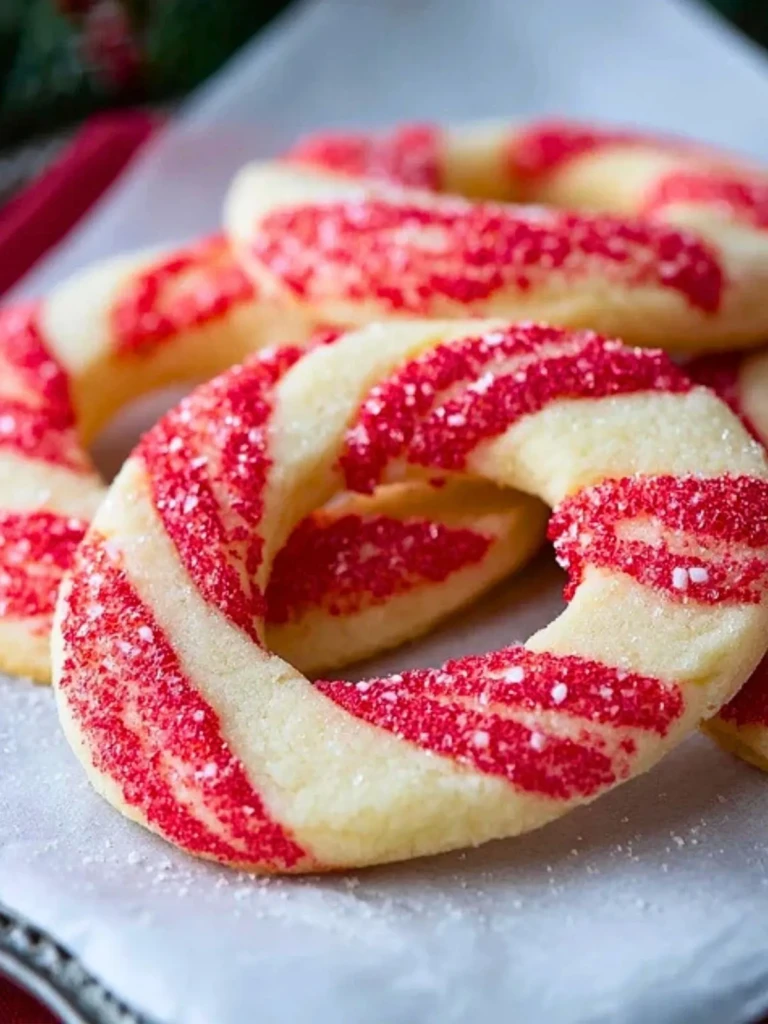
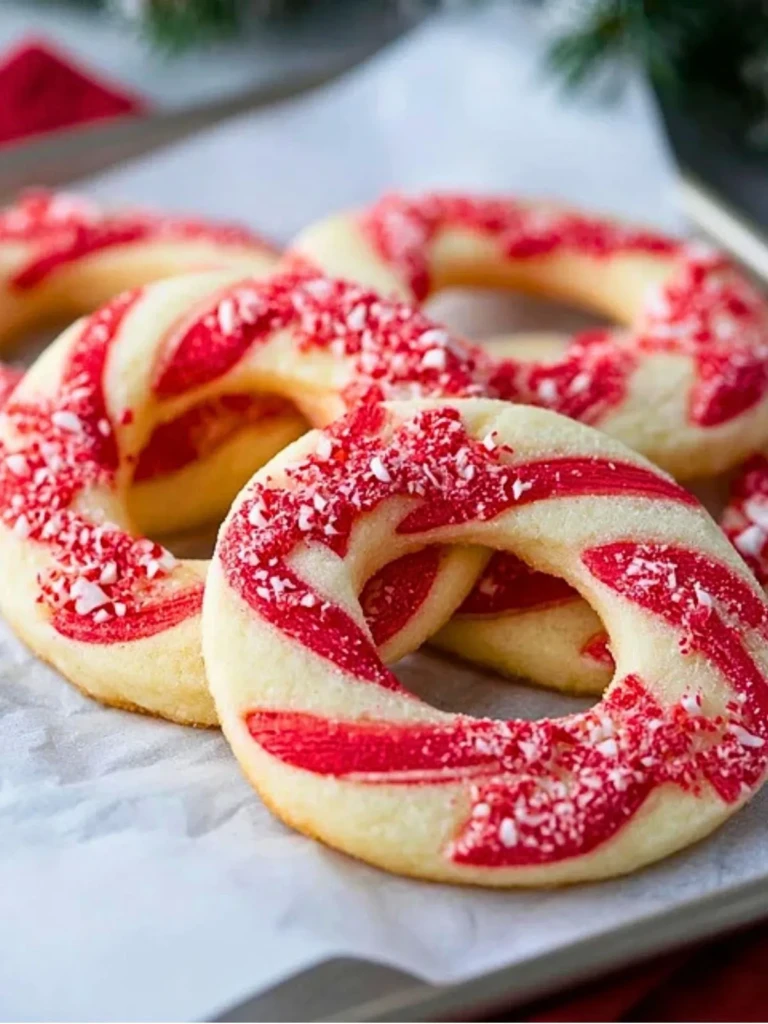
What makes these cookies stand out is the shaping method. Instead of the typical straight candy cane, I twist the dough into circular wreaths, making them easier to bake evenly and much more satisfying to bite into. The visual effect is beautiful—like peppermint swirl ornaments you can eat—and the sugar dusting at the end gives them a frosted, almost snow-kissed finish.
I’ve tried a few versions over the years, but this one nails the balance of texture and flavor. They hold their shape without being dry, and the peppermint is noticeable without overpowering the buttery base. It’s the kind of cookie that earns a place on every holiday tray, and a few extras in the freezer for when guests drop by unexpectedly.

Buttery Dough That Melts Without Spreading
The dough is a classic butter-based shortbread with a slight twist—no eggs, and just the right ratio of flour to butter so it stays soft but doesn’t puff or spread in the oven. That’s key for keeping the shape of the twist intact. I always make sure the butter is softened but not melted—cold butter won’t blend well, and melted butter will make the dough greasy and hard to shape.
You’ll also want to chill the dough after forming the cookies. It firms up the butter and helps the cookies keep those crisp edges. I recommend wrapping the tray in plastic wrap and chilling for at least 30 minutes before baking.
The Peppermint Extract: Just Enough to Tingle
Peppermint can easily overpower everything, and one drop too many will make your cookies taste more like toothpaste than dessert. I use about a half teaspoon for the full batch, and sometimes less if I’m pairing them with other strongly flavored treats. If you’re tempted to use more, taste the dough first. You can always add a touch more, but you can’t take it back.
You can also swap in vanilla or almond extract for a different holiday vibe. Almond and cherry go well together if you’re experimenting with a red and white swirl but want something less minty.
Coloring That Doesn’t Bleed
Gel food coloring works best here. Liquid dyes can water down the dough and cause bleeding during baking. I mix just enough red gel into half the dough until I get that vibrant candy stripe hue. Kneading it in by hand ensures even color and avoids overmixing the dough.
Don’t worry if it looks slightly marbled at first—the swirls come alive once you start rolling the dough ropes together. It adds to that handmade charm.
Shaping and Baking These Little Holiday Wreaths
Once the dough is divided and tinted, I roll each color into thin ropes—about the thickness of a pencil—and twist them gently together. The key is to be patient and avoid stretching the dough too much. If it starts to crack, just press it gently back into shape.
Then I shape each twist into a ring, tucking the ends under so they hold together while baking. I do this directly on the parchment-lined baking sheet, which keeps handling minimal and helps them hold their design. No two cookies are exactly the same, and that’s part of their charm.
Bake at 350°F for about 10–12 minutes. You’re not looking for browning here—just a matte, set surface and a very faint golden hint at the bottom edges. They’ll firm up as they cool, so don’t overbake. When they’re just out of the oven, I sprinkle them lightly with superfine sugar while they’re still warm. It sticks beautifully and adds a frosted sparkle.
Serving Notes and Simple Ways to Store Leftovers
I like to serve these cookies on a tray lined with fresh pine clippings or even tucked into a holiday tin with wax paper layers. They’re stunning on their own but even better next to a mug of peppermint mocha or classic hot chocolate.
Texture-wise, they’re best the day they’re baked—soft in the center, crumbly around the edges—but they hold up beautifully for several days in an airtight container. The sugar coating helps lock in moisture, and they don’t dry out too fast.
If you’re making these ahead, you can freeze the unbaked shaped cookies on a sheet until firm, then transfer to a freezer bag. Bake straight from frozen, adding an extra minute or so. You can also freeze the baked cookies, but I prefer freezing them raw to preserve that fresh-baked snap and aroma.
Why These Cookies Deserve a Spot in Your Holiday Baking List
These candy cane cookies check every box for a holiday favorite: eye-catching, make-ahead friendly, kid-approved, and endlessly giftable. They’re festive enough for a cookie exchange but simple enough to whip up on a snowy afternoon.
What makes them extra special is how versatile they are. You can change the extract, play with colors, or shape them into straight candy canes, hearts, or even candy-striped stars. But I keep coming back to the classic wreath—the texture holds better, and they just feel right on a holiday table.
Compared to other holiday cookies like gingerbread or linzer, these are quicker, less fussy, and more likely to disappear first from the platter. They also happen to pair well with a lot of my other winter favorites, especially anything with chocolate or mint.
Before You Go, Pin and Comment Below
If you’re planning your holiday baking lineup, save this recipe to your “Christmas Cookies” or “Holiday Treats” Pinterest board—you’ll want it handy when the baking urge hits.
Have you tried shaping them a different way? Added a twist like almond extract or dipped half in chocolate? I’d love to hear how you’ve made them your own. Leave a comment and let’s swap some ideas.
Happy baking—and may your kitchen smell like peppermint and butter all season long!
Print
Candy Cane Cookies: Holiday treat for festive gatherings
- Total Time: 42 minutes
- Yield: 20 cookies
- Diet: Vegetarian
Description
Festive, buttery, peppermint-swirled shortbread cookies shaped into charming wreaths. Perfect for cookie trays, gifting, and cozy winter nights.
Ingredients
1 cup unsalted butter, softened
1 cup powdered sugar
1 teaspoon vanilla extract
0.5 teaspoon peppermint extract
2.5 cups all-purpose flour
Red gel food coloring
Superfine sugar, for dusting
Instructions
1. Preheat oven to 350°F and line a baking sheet with parchment paper.
2. In a large bowl, cream together softened butter and powdered sugar until fluffy.
3. Add vanilla and peppermint extracts and mix well.
4. Gradually add flour and mix until dough forms.
5. Divide dough in half. Tint one half with red gel food coloring and knead until evenly colored.
6. Roll small pieces of each dough into thin ropes. Twist one red and one plain rope together and form into a wreath shape.
7. Place wreaths on prepared baking sheet and chill for 30 minutes.
8. Bake for 10–12 minutes, or until just set with a pale golden bottom.
9. While still warm, sprinkle with superfine sugar.
10. Cool completely on a wire rack and store in an airtight container.
Notes
Use softened, not melted, butter to prevent greasy dough.
Gel food coloring works best to avoid bleeding.
Chill shaped cookies before baking for crisp definition.
- Prep Time: 30 minutes
- Cook Time: 12 minutes
- Category: Dessert
- Method: Baking
- Cuisine: American
Nutrition
- Serving Size: 1 cookie
- Calories: 150
- Sugar: 9g
- Sodium: 30mg
- Fat: 8g
- Saturated Fat: 5g
- Unsaturated Fat: 3g
- Trans Fat: 0g
- Carbohydrates: 18g
- Fiber: 0g
- Protein: 1g
- Cholesterol: 20mg
Keywords: holiday cookies, candy cane cookies, peppermint cookies