
This homemade Nutella delivers everything I crave in a chocolate spread: ultra-smooth texture, deep cocoa flavor, and just the right amount of sweetness. It spreads like silk on warm toast and melts beautifully into oatmeal or pancakes.


What sets it apart is the rich flavor of roasted hazelnuts and the absence of that artificial aftertaste you often get with store-bought jars. I use real chocolate, not just cocoa powder, which adds complexity and a glossy finish.
I’ve tried countless versions over the years—some too gritty, others too oily. This one hits the mark with a creamy balance that doesn’t separate or harden in the fridge. Once you make a batch, you’ll wonder why you ever settled for the packaged stuff.
Roasted Hazelnuts Make All the Difference
The key to real Nutella flavor is in the hazelnuts—don’t skip roasting them. I roast mine until the skins crack and the nuts are golden and fragrant. That warmth and depth come through in every bite. Once roasted, I rub off the skins with a kitchen towel (they never come off perfectly, and that’s okay).
Use a high-speed blender or food processor, and keep going until the hazelnuts turn into a silky butter. This part takes a little patience—it starts out gritty, then clumps up, and finally smooths out into a rich paste. If you stop too early, your Nutella won’t have that signature velvety texture.
Melted Chocolate Over Cocoa Powder
Cocoa powder can work in a pinch, but real melted chocolate is what gives this spread its luscious, fudge-like body. I use a mix of dark and milk chocolate to hit that sweet spot between intense and creamy. Don’t overheat it—just gently melt it until smooth.
Once blended with the hazelnut butter and a splash of vanilla, it creates a spread so rich and glossy it looks like it belongs in a bakery display. If you prefer a less sweet version, use only dark chocolate and skip the added sugar altogether.
A Touch of Neutral Oil and Salt
I use a mild oil like sunflower or grapeseed to help thin out the blend and keep it spoonable even after chilling. Olive oil adds too much of its own flavor here, so I avoid it. Just a tablespoon or two is enough.
And don’t forget the salt—a small pinch sharpens all the flavors and brings out the richness of the chocolate. Without it, the spread tastes flat. I learned that the hard way.
Blending to the Perfect Texture and Knowing When It’s Done
Once all your ingredients are in the processor, the final blending is what makes or breaks this recipe. The texture should be smooth and pourable, not gritty or stiff. I let the machine run for several minutes, stopping occasionally to scrape down the sides.
You’ll notice a moment when it all comes together—it goes from a dull paste to a glossy, cohesive spread. That’s your signal. If it looks thick or chalky, blend longer. If it gets too thick, a drizzle more oil usually solves it.
There’s no cooking here, just gentle melting and blending, so it’s all about the visual cues. When it spreads like frosting and clings softly to the spoon, it’s done.
Planning ahead? This spread keeps beautifully in the fridge for a month. Just let it come to room temperature before using—it loosens up perfectly without reheating.
How I Serve It and How It Stores
My favorite way to enjoy this Nutella is warm on sourdough toast—it gets slightly melty and turns into something dangerously good. I also swirl it into banana bread batter or use it as a dip for strawberries and apple slices.
Over time, the texture stays soft if stored right. I keep mine in a sealed jar in the fridge, where it lasts up to four weeks. I recommend pulling it out about 15 minutes before using, especially if you’re spreading it on something delicate like crepes.
If you notice slight separation, just give it a stir. Unlike store-bought versions, this one doesn’t use stabilizers, but it’s simple to re-emulsify with a spoon or quick blitz in the blender. I’ve even frozen small portions for longer storage—just thaw and stir before serving.
Why This Spread Deserves a Place in Your Everyday Repertoire
This homemade Nutella isn’t just a special treat—it’s one of those kitchen staples I keep coming back to. It makes weekday breakfasts feel luxurious and gives desserts an instant upgrade.
It also adapts beautifully. Want it dairy-free? Use vegan chocolate. Need it nut-free? Sunflower seeds work surprisingly well. I’ve even stirred it into hot milk for a makeshift hot chocolate.
Compared to the store-bought versions I’ve tried—and there have been many—this one wins on flavor, texture, and the fact that I know exactly what’s in it. No palm oil, no preservatives, no mystery ingredients. Just real chocolate, toasted nuts, and a bit of love blended in.
Before You Go, Pin and Comment Below
If you’re a Pinterest saver, this recipe deserves a spot on your “Homemade Spreads,” “Chocolate Cravings,” or even your “Sunday Brunch Ideas” board. It’s one of those recipes you’ll want to come back to often.
I’d love to hear if you try it—especially if you tweak it. Did you go with all dark chocolate? Try almonds instead? Make a big batch and gift it in jars? Leave a comment and let’s swap ideas. There’s something special about making a treat like this from scratch, and I hope it becomes a new favorite in your kitchen too.
Print
Homemade Nutella: Creamy, Chocolatey, and Surprisingly Simple
- Total Time: 30 minutes
- Yield: 1 1/4 cups
- Diet: Vegetarian
Description
This homemade Nutella is a rich, creamy chocolate-hazelnut spread made with real roasted hazelnuts, melted chocolate, and a hint of vanilla. It’s smooth, glossy, and deeply satisfying—perfect for toast, fruit, or baking.
Ingredients
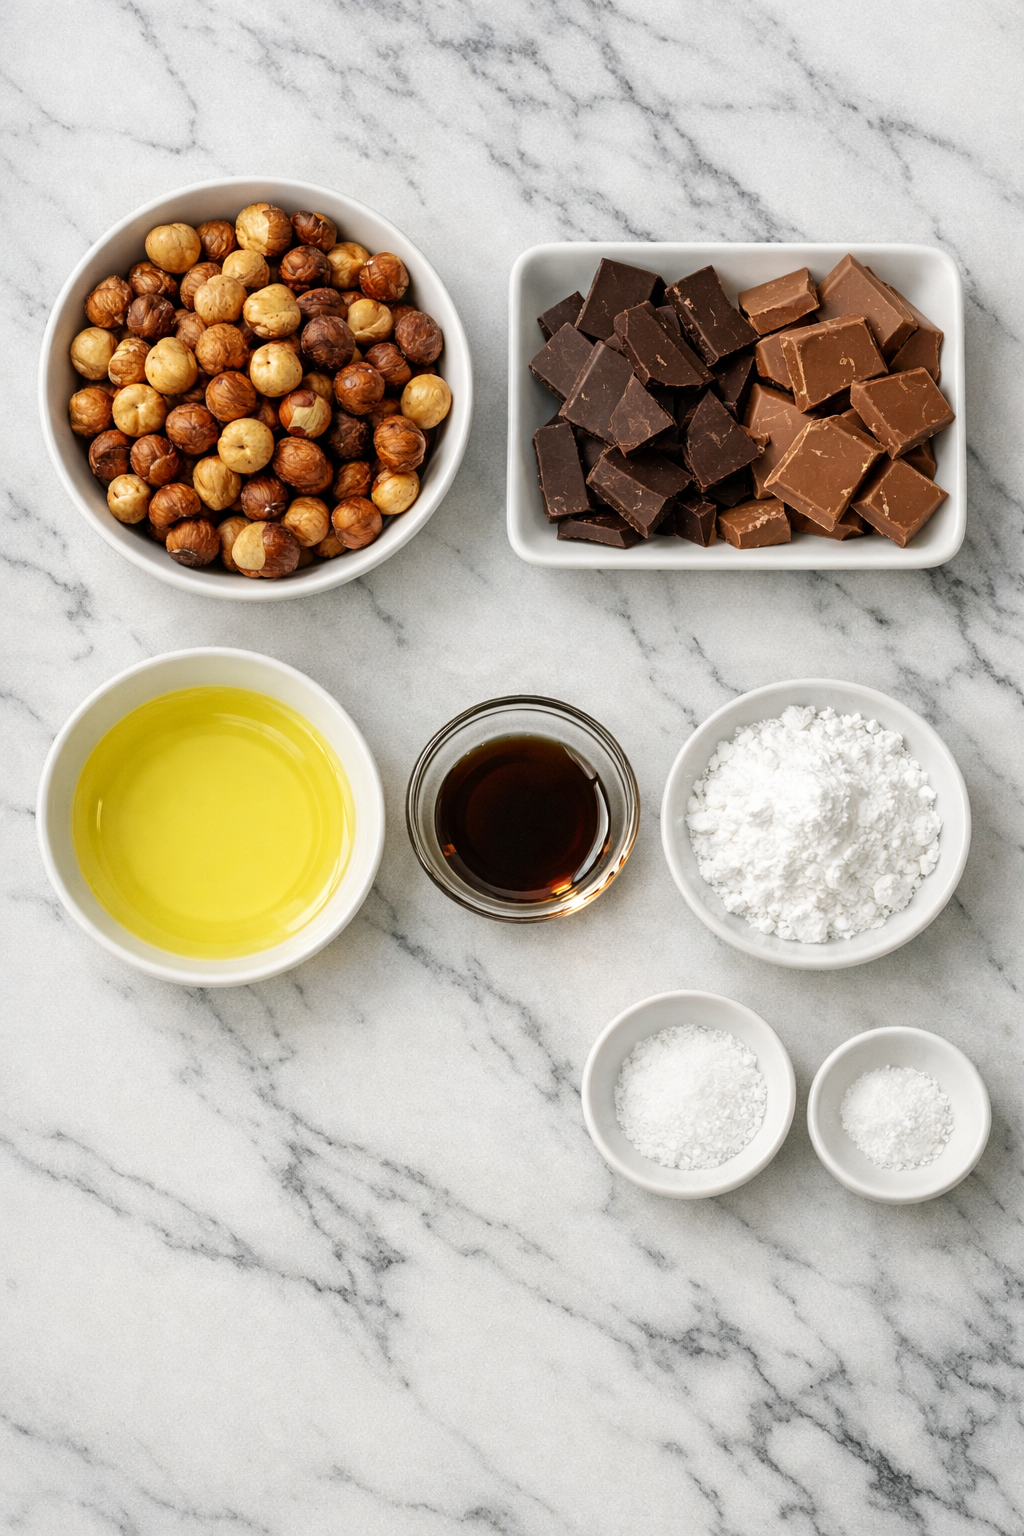
1 cup roasted hazelnuts
4 ounces dark chocolate
4 ounces milk chocolate
2 tablespoons sunflower oil
1 teaspoon vanilla extract
1 tablespoon powdered sugar (optional)
1/4 teaspoon fine sea salt
Instructions
1. Roast hazelnuts at 350°F for 10–12 minutes until golden and fragrant. Let cool slightly.
2. Rub the skins off using a kitchen towel. Some bits will remain, and that’s fine.
3. Add the hazelnuts to a high-speed blender or food processor and blend until smooth, scraping down the sides as needed.
4. Melt the chocolates gently in a heatproof bowl over simmering water or in the microwave in 15-second bursts. Stir until smooth.
5. Add the melted chocolate, oil, vanilla, sugar (if using), and salt to the hazelnut butter. Blend again until glossy and smooth.
6. Adjust consistency with more oil if needed.
7. Pour into a clean jar and store refrigerated for up to one month. Let it sit at room temp before spreading.
Notes
Roast your hazelnuts until golden to maximize flavor.
Use real chocolate, not just cocoa powder, for richness and shine.
If the spread thickens too much in the fridge, let it sit at room temperature or stir in a little more oil.
- Prep Time: 20 minutes
- Cook Time: 10 minutes
- Category: Spreads
- Method: Blending
- Cuisine: European
Nutrition
- Serving Size: 2 tablespoons
- Calories: 180
- Sugar: 10g
- Sodium: 50mg
- Fat: 15g
- Saturated Fat: 4.5g
- Unsaturated Fat: 9.5g
- Trans Fat: 0g
- Carbohydrates: 12g
- Fiber: 2g
- Protein: 3g
- Cholesterol: 2mg
Keywords: nutella, chocolate spread, hazelnut spread