
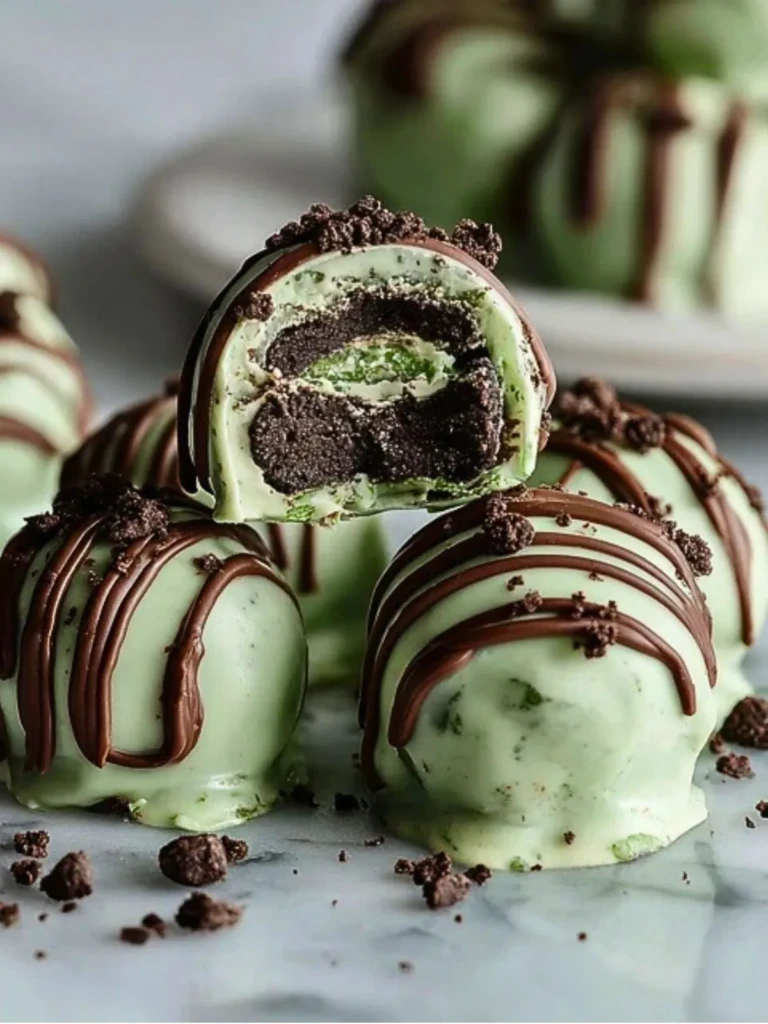
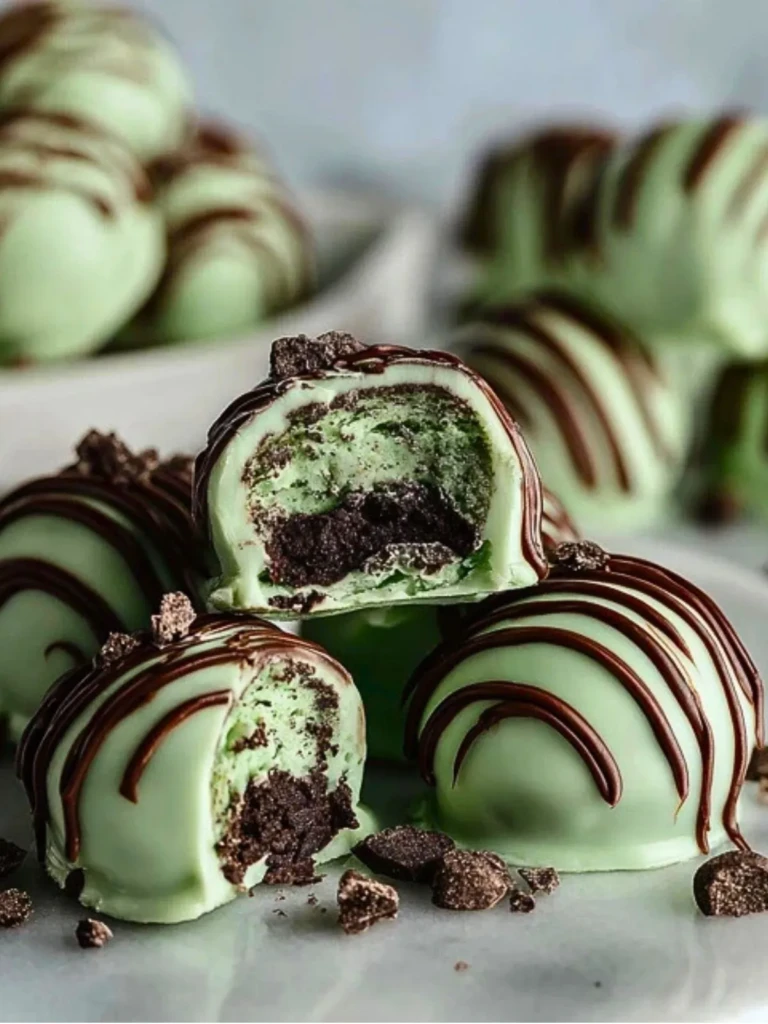
If you’ve ever wanted a truly no-fuss dessert that delivers rich, chocolatey satisfaction with a refreshing twist, Mint Oreo Truffles might be your new go-to. These indulgent little bites require no oven, no complicated techniques, and no more than a handful of ingredients. They’re perfect for busy bakers who still want their creations to wow. You’ll learn exactly how to balance chocolate and mint, how to achieve that signature creamy center without it becoming too soft or gritty, and why the coating matters as much as the filling.
While many truffle recipes can end up too sweet, too dense, or lacking structural integrity, this version delivers the perfect contrast of textures and flavors. The coolness of mint doesn’t overpower, the chocolate shell provides a clean snap, and the interior is creamy without being cloying. Compared to traditional ganache-based truffles, these are lighter, faster, and infinitely more forgiving. And when stacked up against common cookie ball recipes, they rise above thanks to a tighter ratio of cream cheese to cookies and a specific chocolate shell finish.
Within the world of no-bake desserts, these sit proudly at the intersection of nostalgic and elegant. They’re just at home on a holiday platter as they are at a last-minute party spread. Whether you’re dressing them up with a drizzle of white chocolate or keeping them rustic with cookie crumbs, Mint Oreo Truffles offer professional-quality results with minimal hands-on time.
Bring these to the table and watch them disappear. With their cool, creamy center and snappy mint shell, they’re the kind of treat people ask about, then reach for seconds before the tray has even made a full circle.

Ingredients for the Mint Oreo Truffles
The base of these Mint Oreo Truffles begins with one of the most functional pantry-ready heroes: mint-flavored Oreo cookies. These not only provide structure but also carry the chocolate-mint flavor profile through both the cookie and the filling. When processed into fine crumbs, they create a paste-like consistency that blends seamlessly with softened cream cheese, which acts as the binder. Regular cream cheese, full-fat and brick-style, is essential here for its stability and richness. Tub-style cream cheese or reduced-fat versions create a looser texture that doesn’t set up as well.
For the coating, melting chocolate wafers are my top choice due to their smooth finish and quick setting properties. Mint-colored white chocolate melts enhance the visual identity and reinforce the mint theme without additional extract. While white chocolate chips with a splash of oil can work in a pinch, they tend to seize more easily and don’t always produce a smooth shell. Testing with both showed that melting wafers provided the cleanest result and didn’t obscure the flavor of the interior.
To finish, I like using either finely crushed plain Oreos or a small amount of reserved mint Oreo crumbs to sprinkle over the top. This adds texture and signals flavor, especially helpful if you’re presenting a dessert spread with various truffle flavors. For a fancier presentation, a drizzle of contrasting chocolate – dark or white – adds polish without requiring piping skills.
If fresh mint is on hand, a very small pinch finely chopped can be kneaded into the filling for a botanical lift. Just use it sparingly to avoid overpowering the other flavors. Similarly, food coloring isn’t necessary with mint chocolate melts, but if you’re using plain white chocolate and want the same pale green tone, a small amount of gel-based coloring will hold up better than liquid food dye.
These ingredients together create a confection that is creamy but stable, refreshingly minty without becoming medicinal, and coated in a shell that balances sweetness with structure. The same foundation applies across other flavor variations—like peanut butter or birthday cake Oreo truffles—but the mint version remains the most visually striking and refreshingly indulgent.
Choosing Between Mint Oreos and Classic Oreos with Extract
One of the key decision points when making Mint Oreo Truffles is whether to use pre-flavored Mint Oreos or start with classic Oreos and add peppermint extract. I tested both options side-by-side to understand how they affect flavor, texture, and aroma.
Mint Oreos deliver a ready-made balance of chocolate and mint that is surprisingly well-calibrated for a no-bake truffle. The cream layer infuses the entire filling with mint without requiring any measurement or adjustment. Texture-wise, the consistency remains smooth and dense, thanks to the even integration of the flavored filling with the cookie base. This version is straightforward, less prone to error, and great for anyone concerned about overdoing the mint.
Using classic Oreos and adding peppermint extract, however, offers more control. You can adjust the intensity of mint to your preference and even experiment with types of mint, such as spearmint or pure peppermint. But this method comes with a margin of error—extracts are potent, and just a drop too much can push the flavor into toothpaste territory. When comparing results, I found that unless you’re experienced with flavor extracts, the Mint Oreo route is both safer and more consistent.
Cost and availability can also influence your choice. Mint Oreos are a seasonal or specialty item in some regions, whereas classic Oreos and peppermint extract are more universally stocked. If you’re making these truffles off-season or in large batches, the extract method offers scalability.
In the broader world of cookie truffles, using flavored sandwich cookies as a shortcut to layered flavor is a practical and popular strategy. It removes guesswork and delivers dependable results, especially in recipes that rely on no-bake stability. For this particular recipe, I recommend Mint Oreos unless you’re specifically looking to tailor the mint flavor to your exact taste profile.
The Chilling Technique That Protects the Shape and Snap
In no-bake truffle making, the most underestimated technique is also the most essential: proper chilling. Without it, even the best-flavored filling will lose its form and fail to pair well with the coating. Chilling safeguards both structure and coating quality by preparing the truffle centers to handle warm chocolate without softening or deforming.
After forming the truffle balls, I always chill them for at least 30 minutes before dipping. This rest period firms up the cream cheese base, ensuring the interior holds a consistent texture when bitten into. Skipping or shortening this stage often leads to flattened or uneven spheres, and the melted coating will slide off rather than cling and set.
When dipping into chocolate, a cold core allows the shell to harden quickly, giving it that professional snap and smooth finish. You want to feel slight resistance on the first bite, followed by the creamy, minty center. If the filling is too soft or room temperature, the coating tends to bloom (those white streaks) or pool around the base unevenly.
If you’re working in a warm kitchen or making multiple batches, I recommend returning the truffles to the fridge between each stage: post-rolling, post-dipping, and even pre-decorating. It might seem excessive, but each chilling interval strengthens the overall appearance and texture.
This same technique applies across all no-bake truffle variations—from red velvet to cookie dough—but it’s particularly crucial with cream cheese-based centers. Chilling isn’t just a passive step; it’s an active quality control measure that separates homemade from homemade-but-professional.
Serving and Storing Mint Oreo Truffles
Presentation plays a major role in how these Mint Oreo Truffles are received. For a clean, elegant finish, place them in mini paper candy cups or line them up on a marble or slate tray. If you’re serving for a holiday or event, a drizzle of contrasting chocolate and a final dusting of Oreo crumbs gives them a bakery-style look with minimal effort.
Because these are chilled truffles, serve them slightly cool but not cold from the fridge. About 10 minutes at room temperature is enough to soften the shell slightly while preserving the creamy bite. They’ll hold their shape well at room temperature for several hours, especially if the initial chill time was done properly.
For make-ahead convenience, these truffles are exceptional. The undipped truffle centers can be stored in the fridge for up to 3 days or frozen for up to a month. Once coated, they stay fresh in the refrigerator for about 10 days in an airtight container. If stacking them, place parchment between layers to prevent sticking or cracking.
Over time, the mint flavor continues to integrate and mellow, becoming smoother and more rounded by day two or three. This makes them a great candidate for prepping ahead for holidays, gifting, or events. The coating helps preserve the interior, and the cool temperature slows any degradation of texture.
Mint Oreo Truffles follow the same storage principles as similar cream cheese-based no-bake desserts like cheesecake bites or Oreo balls. Cold storage enhances flavor clarity and maintains the visual polish, so don’t skip it if you want these treats to look as good as they taste.
A Quick Note on Comparisons With Other No-Bake Truffles
When compared with classic no-bake truffles, Mint Oreo Truffles bring a distinct freshness that sets them apart. Traditional versions—like chocolate ganache truffles or peanut butter balls—often lean heavily into richness and tend to feel denser or more indulgent. These minty variations offer a balanced contrast by lifting the palate with their cool finish, making them ideal for finishing a rich meal or balancing a dessert tray.
Reader feedback frequently highlights how surprising the flavor contrast is—many expect a simple Oreo ball, but are met with a refined minty brightness. Some even compare the flavor to mint chocolate chip ice cream, which makes sense given the creamy chocolate-mint profile and firm texture. The reaction is often delight at how such a minimal-ingredient recipe can deliver a boutique confectionery feel.
What makes these truffles stand out in the broader truffle category is their adaptability. You can switch the shell, adjust the mint level, or scale the batch for gifting without compromising quality. They’re also visually more engaging than plain chocolate-coated truffles thanks to the pale green hue and speckled topping.
If you’ve made other cookie-based truffles like Golden Oreo lemon bites or red velvet truffles, you’ll recognize the same structural base here, but the mint version delivers a distinctly cleaner finish. It cuts through sweetness without veering into bitter or harsh territory, which is often the downfall of other mint desserts.
Ultimately, this recipe belongs in the rotation for anyone who wants flavor depth and a show-stopping bite without labor-intensive prep. It’s a standout in the world of no-bake confections for good reason.
Print
Mint Oreo Truffles – No-Bake Dessert Bites with a Cool Mint Twist
- Total Time: 1 hour
- Yield: 24 truffles
- Diet: Vegetarian
Description
Creamy, no-bake mint Oreo truffles with a refreshing chocolate-mint center and a crisp candy coating. A chilled treat perfect for parties, gifts, or holiday trays.
Ingredients
24 Mint Oreo cookies
113 grams cream cheese, softened (about 4 oz)
225 grams mint-flavored white chocolate melting wafers (about 8 oz)
30 grams additional crushed Oreos for garnish (about 4 cookies)
Optional: 1 drop green gel food coloring
Optional: 1 tablespoon finely chopped fresh mint
Instructions
1. Crush the Mint Oreo cookies into fine crumbs using a food processor or by placing them in a sealed bag and crushing with a rolling pin.
2. Add softened cream cheese to the crushed cookies and mix until fully combined into a thick dough.
3. Scoop and roll the mixture into small balls about 1 inch in diameter. Place on a parchment-lined tray and chill in the refrigerator for 30–45 minutes.
4. Melt the mint-flavored white chocolate wafers according to package instructions until smooth.
5. Dip each chilled truffle into the melted coating, using a fork to lift and gently tap off excess chocolate. Place coated truffles back on the parchment-lined tray.
6. Before the coating sets completely, sprinkle the tops with crushed Oreos or drizzle with contrasting chocolate, if desired.
7. Chill again for 10–15 minutes until the coating is fully set. Serve slightly cool for best texture.
8. Store in an airtight container in the fridge for up to 10 days or freeze undipped balls for up to 1 month.
Notes
Chilling the centers thoroughly ensures a clean dip and crisp coating.
Use full-fat brick-style cream cheese for best structure and flavor.
Mint Oreos provide a balanced flavor, but classic Oreos with peppermint extract can work if needed.
- Prep Time: 45 minutes
- Cook Time: 0 minutes
- Category: Dessert
- Method: No-Bake
- Cuisine: American
Nutrition
- Serving Size: 1 truffle
- Calories: 110
- Sugar: 9g
- Sodium: 85mg
- Fat: 6g
- Saturated Fat: 3.5g
- Unsaturated Fat: 2g
- Trans Fat: 0g
- Carbohydrates: 13g
- Fiber: 0.5g
- Protein: 1g
- Cholesterol: 10mg
Keywords: mint truffles, Oreo dessert, no bake treats, holiday candies