These oatmeal bars are a prime example of a recipe that feels like home yet performs like a bakery treat. If you’re looking for something you can bake without a mixer, without a fussy technique, and with ingredients you likely already have, you’re in the right place. You’ll come away from this recipe knowing how to achieve the ideal crumbly texture with oats, how to keep a fruity center from becoming runny or dry, and why the layering technique matters more than it seems.
The most common downfall of homemade oatmeal bars is a soggy center or a dry, overly crisp top. This version counters that by calibrating the oat-to-fat ratio carefully and using a layering technique that traps moisture inside while allowing the crust to hold its shape. While many oatmeal bars rely on a one-layer press-and-bake method, this recipe shows how strategic layering improves texture and bite.
Within the world of snackable bar cookies, oatmeal bars occupy a unique space. They straddle the line between dessert and breakfast, comfort and indulgence, wholesome and decadent. This version emphasizes that duality: rich with butter, yet hearty with oats; sweet with jam, yet balanced with a hint of salt and spice. It’s the kind of recipe you can bring to a school event, keep in the freezer for weekday snacks, or wrap up as a rustic homemade gift.
Bringing these oatmeal bars to the table means more than just sharing a dessert. It offers a balance of crispness, chew, and tart-sweet flavor that wins over both kids and adults. Each slice carries the promise of familiar warmth with a professional polish, the kind of treat that disappears faster than expected and begs to be made again.

Ingredients for the Oatmeal Bars
The crust begins with all-purpose flour as its structural base. It gives the bars body and ensures a cohesive bite without overwhelming density. I tested versions with whole wheat flour, and while it added a nutty tone, it made the final bars drier and more prone to crumbling, so I recommend sticking with all-purpose unless you’re intentionally aiming for a heartier bar.
Old-fashioned rolled oats provide the signature chew and visual appeal. Quick oats, by comparison, absorb more moisture and tend to create a denser bar that lacks texture. The rolled variety keeps its shape during baking, yielding a more structured crumb and better mouthfeel.
Brown sugar adds more than sweetness; its molasses content provides moisture and a subtle caramel note that complements the fruity center. I used light brown sugar here for a balanced sweetness, though dark brown sugar can deepen the flavor for those who prefer a more robust result.
Butter is the core fat in this recipe, creating the tender texture and rich flavor that sets these bars apart. I use unsalted butter to control the overall salt level. During testing, margarine and coconut oil lacked the same cohesive crumb and flavor depth, making real butter the best choice here.
Baking soda helps to slightly lift the oat mixture, preventing a flat, overly compressed layer. Combined with a touch of cinnamon and salt, it provides flavor support and balance.
For the fruit layer, raspberry preserves shine best. They deliver a bold tartness that contrasts beautifully with the sweet oat layers. Strawberry or apricot jam work well too, but tend to produce a more muted profile. I prefer preserves over jellies or fruit spreads because they contain actual fruit bits that thicken slightly during baking, giving the filling more body and character.
A splash of vanilla extract ties the whole thing together. It rounds out the sweetness and deepens the complexity of the oat base, making it taste like more than just oats and butter. It’s subtle, but noticeable when omitted.
If needed, this recipe adapts well. Gluten-free all-purpose flour blends work here with minimal textural difference. You can also reduce the sugar by a third for a less sweet version without compromising structure. And while raspberry is my first choice, almost any quality preserve will hold up—just avoid ones that are too watery, which could seep into the crust and make it soggy.
Choosing Between Raspberry and Strawberry Preserves
While raspberry and strawberry preserves are both common favorites for oatmeal bars, they behave quite differently during baking and affect the final result in meaningful ways. Raspberry preserves have a natural tartness that stands up to the sweet oat layers and cuts through the butter with welcome contrast. Their texture tends to be thicker, which prevents them from seeping into the base or making the bars soggy.
Strawberry preserves offer a sweeter, rounder flavor with a more familiar fruit-forward profile, but they often contain more liquid, especially when store-bought. This extra moisture can cause the center of the bar to become sticky rather than cohesive. That said, strawberry is a strong choice when baking for kids or for those who prefer a classic, comforting flavor.
If you’re baking for an event where presentation matters or the bars will be sitting out for hours, raspberry tends to hold its shape and color more reliably. Strawberry works best when the bars are stored chilled or eaten quickly. From a cost standpoint, both are usually similarly priced, though raspberry can occasionally be more expensive due to seed content and fruit yield.
For a balanced in-between, a blend of raspberry and strawberry preserves also performs well—it softens the tart edge while preserving a thicker consistency. This mirrors what I’ve seen in some bakery recipes that aim for mass appeal while maintaining structure. Ultimately, your choice should reflect your flavor preferences and how the bars will be served.
The Press-and-Crumble Method That Protects the Crust
The core method that defines this oatmeal bar recipe is the press-and-crumble approach. This technique gives you both a sturdy base and a lightly textured topping, all from the same dough. It’s a streamlined method, but more importantly, it strategically manages moisture and structure in a way that single-layer bars often fail to do.
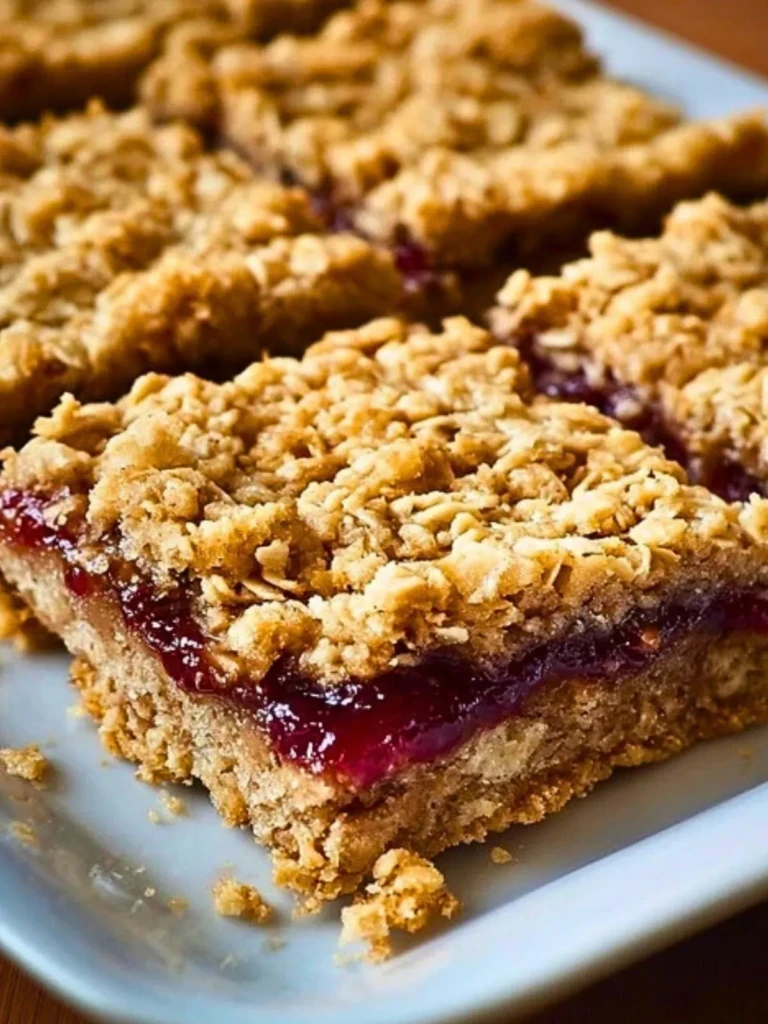
After mixing the oat mixture, I press two-thirds of it firmly into the bottom of the pan. This firm press ensures the base will hold together after slicing, preventing a crumbly mess. The remaining third is crumbled loosely over the top after the filling is added. This lighter touch allows the top to bake into a golden, crisp layer without becoming dense.
This dual treatment of the oat mixture is crucial. Pressing the entire batch would make the bars overly compact and tough. Crumbling it all would lead to structural instability. By dividing the dough and changing how it’s handled, you balance strength and tenderness.
A common mistake is under-pressing the base or overloading it with jam. Both can cause the bars to fall apart. Another is patting down the top layer, which flattens the texture and traps steam. Keeping that top loose and uneven invites just the right amount of crisping and visual appeal.
You’ll know the bars are baked correctly when the edges are deeply golden and the fruit layer begins to bubble slightly. The top should feel set but not hard. This technique is not just for oatmeal bars—you’ll see it echoed in classic crumb cakes and fruit crumble bars where texture contrast is key.
Serving and Storing Oatmeal Bars
These bars are at their textural peak a few hours after baking, once they’ve fully cooled and set. I recommend letting them rest at room temperature for at least two hours before cutting. This helps the crust firm up and the filling stabilize, making cleaner, more attractive slices.
For serving, they don’t need much embellishment. A dusting of powdered sugar works well if you want a touch of elegance, especially for brunches or bake sales. If you’re offering them as dessert, they pair beautifully with a dollop of whipped cream or a scoop of vanilla ice cream.
In terms of storage, these bars are impressively durable. At room temperature in an airtight container, they keep for about three days. Refrigerated, they’ll last up to a week and still maintain most of their texture. They also freeze exceptionally well—wrap them tightly and store for up to two months. I suggest slicing before freezing so you can grab a piece or two at a time.
The flavor continues to develop over the first day or two. The oats absorb just a bit more moisture from the jam, and the buttery notes deepen, making the bars taste even richer. This makes them ideal for making ahead of time when entertaining or packing lunches.
This approach to storing and serving follows the same logic as other oat-based bakes like date squares and apple crumble bars. Their rustic charm is matched by their practicality—they look homemade, last beautifully, and taste even better with time.
A Quick Note on Comparisons With Other Bar Recipes
Compared to classic dessert bars like lemon squares or brownies, oatmeal bars offer a unique textural and nutritional profile. They lean into the rustic, whole-grain category, providing chew and substance without requiring high sugar or rich chocolate to satisfy. This particular version bridges the gap between a dessert and a snack, making it more versatile than richer bars meant solely for after dinner.
Where some oatmeal bars tend to skew toward breakfast bars—soft, often cakey, sometimes under-sweetened—this recipe keeps the heartiness while still delivering enough richness and sweetness to feel indulgent. It’s not trying to be a health bar, but it brings an air of wholesomeness with the oats and jam base that sets it apart from dense, sugary alternatives.
In reader feedback and testing groups, this version consistently stands out for its balance. It’s a favorite among those who want something “not too sweet” yet fully satisfying. Unlike single-layer granola bars that can be dry or overly crunchy, or jam thumbprint cookies that are individually finicky to shape, these bars achieve flavor and efficiency in one go.
The advantage here is in the structure and method. By keeping the dough and filling layers distinct but cohesive, it mimics some of the best qualities found in fruit crisps, crumble bars, and even layered cookie bars—but in a form that slices cleanly and travels well.
If you’ve made other oat-based recipes like blueberry crumble bars or cherry pie bars, you’ll find the same ease and payoff here, but with a more concentrated oat-forward flavor and fewer steps. It’s a foundational recipe that can anchor your dessert rotation with both dependability and character.
Print
Oatmeal Bars – Buttery, Fruity, and Comfortingly Crumbly
- Total Time: 50 minutes
- Yield: 16 bars
- Diet: Vegetarian
Description
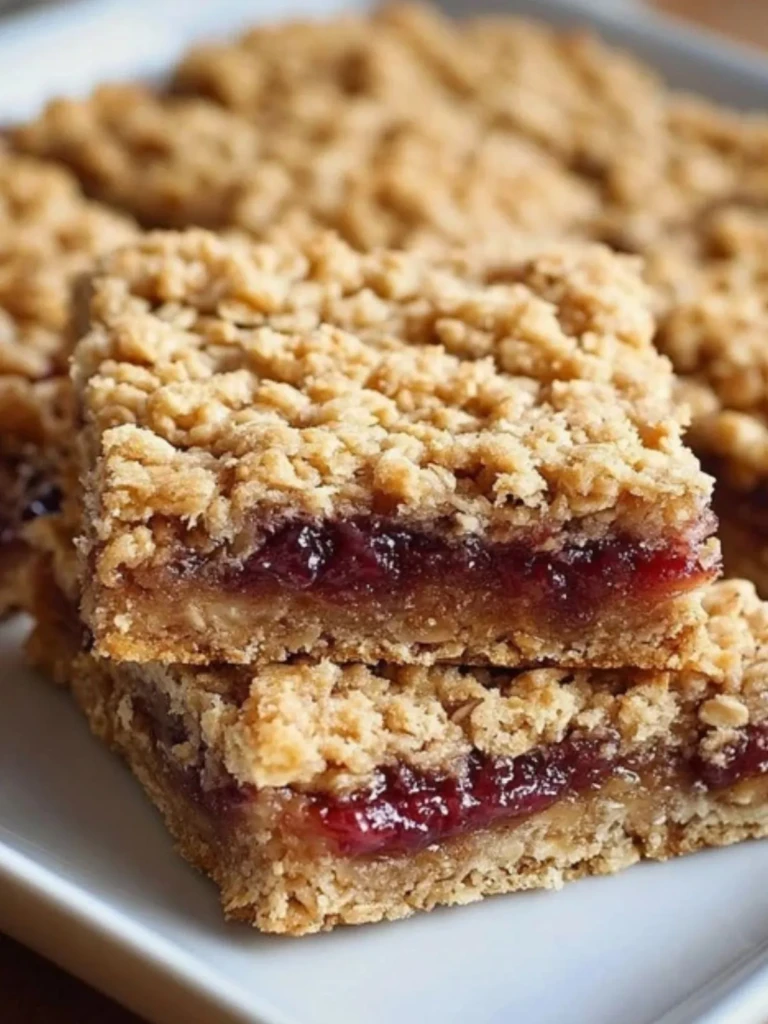
These buttery oatmeal bars have a crumbly oat crust, a rich raspberry jam center, and a golden crumble topping. Balanced between indulgent and wholesome, they make the perfect snack, brunch treat, or rustic dessert. A bakery-style result using everyday ingredients and a press-and-crumble method that ensures both texture and structure.
Ingredients
1 cup all-purpose flour
1 cup old-fashioned rolled oats
2/3 cup light brown sugar, packed
1/2 teaspoon baking soda
1/4 teaspoon salt
1/2 teaspoon cinnamon
1/2 cup unsalted butter, melted
1 teaspoon vanilla extract
3/4 cup raspberry preserves (or preferred fruit preserves)
Instructions
1. Preheat the oven to 350°F (175°C). Line an 8×8-inch baking pan with parchment paper.
2. In a large bowl, combine flour, oats, brown sugar, baking soda, salt, and cinnamon.
3. Stir in melted butter and vanilla extract until the mixture forms a moist, crumbly dough.
4. Press about two-thirds of the mixture firmly into the prepared pan to form an even crust.
5. Spread the raspberry preserves evenly over the crust, leaving a small border around the edges.
6. Crumble the remaining oat mixture over the top without pressing it down.
7. Bake for 30–35 minutes, or until the top is golden brown and the jam is bubbling slightly at the edges.
8. Let the bars cool completely in the pan before slicing into squares.
9. Store in an airtight container at room temperature for up to 3 days or refrigerate for up to a week.
Notes
Use old-fashioned oats for texture; quick oats can make the bars dense.
Don’t overfill with jam—thicker preserves work better than jelly.
Cool bars fully before cutting to help them hold their shape cleanly.
- Prep Time: 15 minutes
- Cook Time: 35 minutes
- Category: Dessert
- Method: Baking
- Cuisine: American
Nutrition
- Serving Size: 1 bar
- Calories: 180
- Sugar: 12g
- Sodium: 80mg
- Fat: 8g
- Saturated Fat: 5g
- Unsaturated Fat: 2g
- Trans Fat: 0g
- Carbohydrates: 25g
- Fiber: 1g
- Protein: 2g
- Cholesterol: 20mg
Keywords: oatmeal bars, raspberry bars, crumble bars