
These Old-Fashioned Butter Mints are creamy, melt-in-your-mouth candies that bring back sweet memories of holidays, weddings, and grandma’s candy dish. Their pastel colors and soft texture make them as beautiful as they are addictive. Whether you’re gifting them in jars, using them as baby shower treats, or just enjoying them after dinner, these buttery mints are a nostalgic delight.

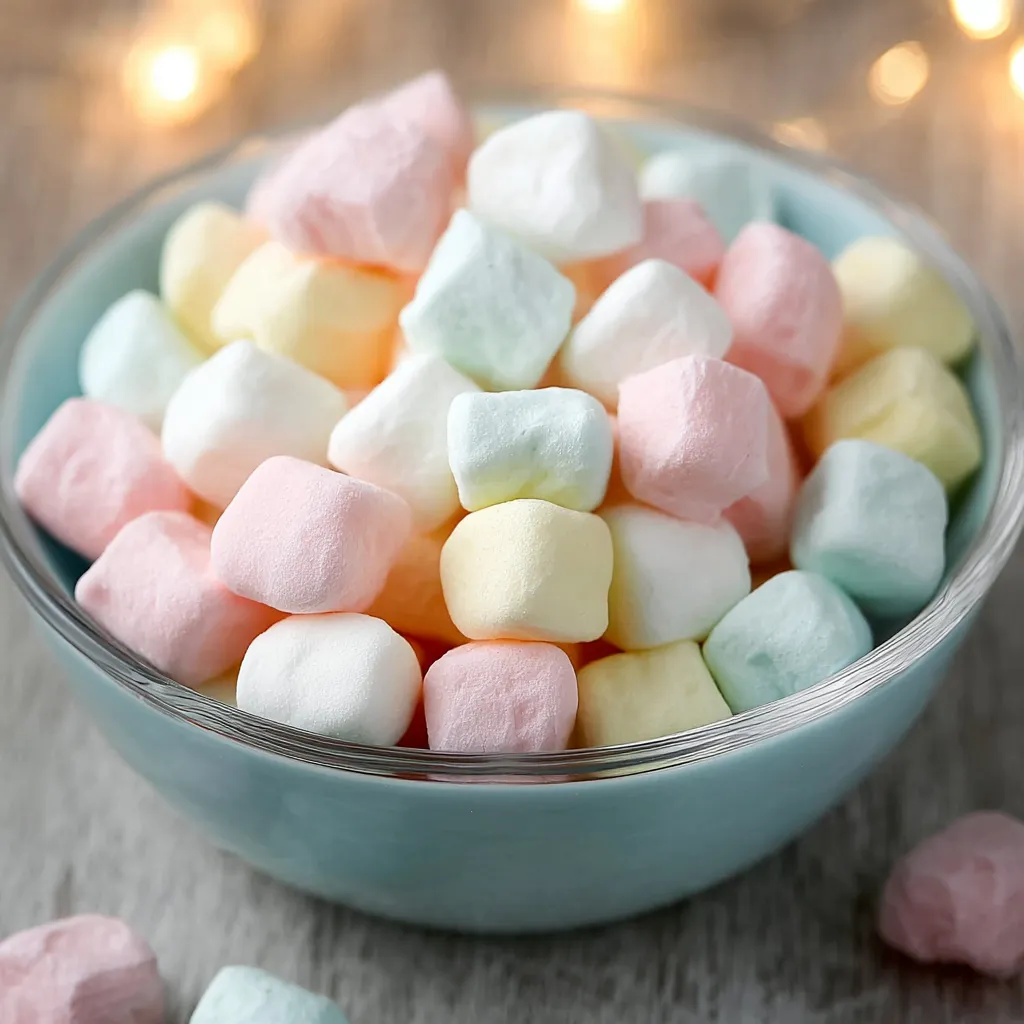
With a tender texture between fudge and fondant, these mints offer the perfect balance of sweetness and richness. They don’t require any cooking or special equipment—just a few ingredients and a little patience. Once set, they deliver that classic creamy snap that’s oh-so-satisfying.
Why You’ll Love This Old-Fashioned Butter Mints Recipe
- No cooking or candy thermometer required
- Perfect make-ahead treat for parties, weddings, and holidays
- Customizable with your favorite extract or food coloring
- Uses simple pantry staples
- Irresistibly soft and creamy
What Kind of Butter Should I Use?
Use unsalted, high-quality real butter for the richest and smoothest flavor. Since butter is the heart of this recipe, its quality truly matters. Let it soften fully before mixing to ensure a fluffy, pillowy mint texture. Avoid margarine or whipped butters, which may alter the texture.
Ingredients for the Old-Fashioned Butter Mints
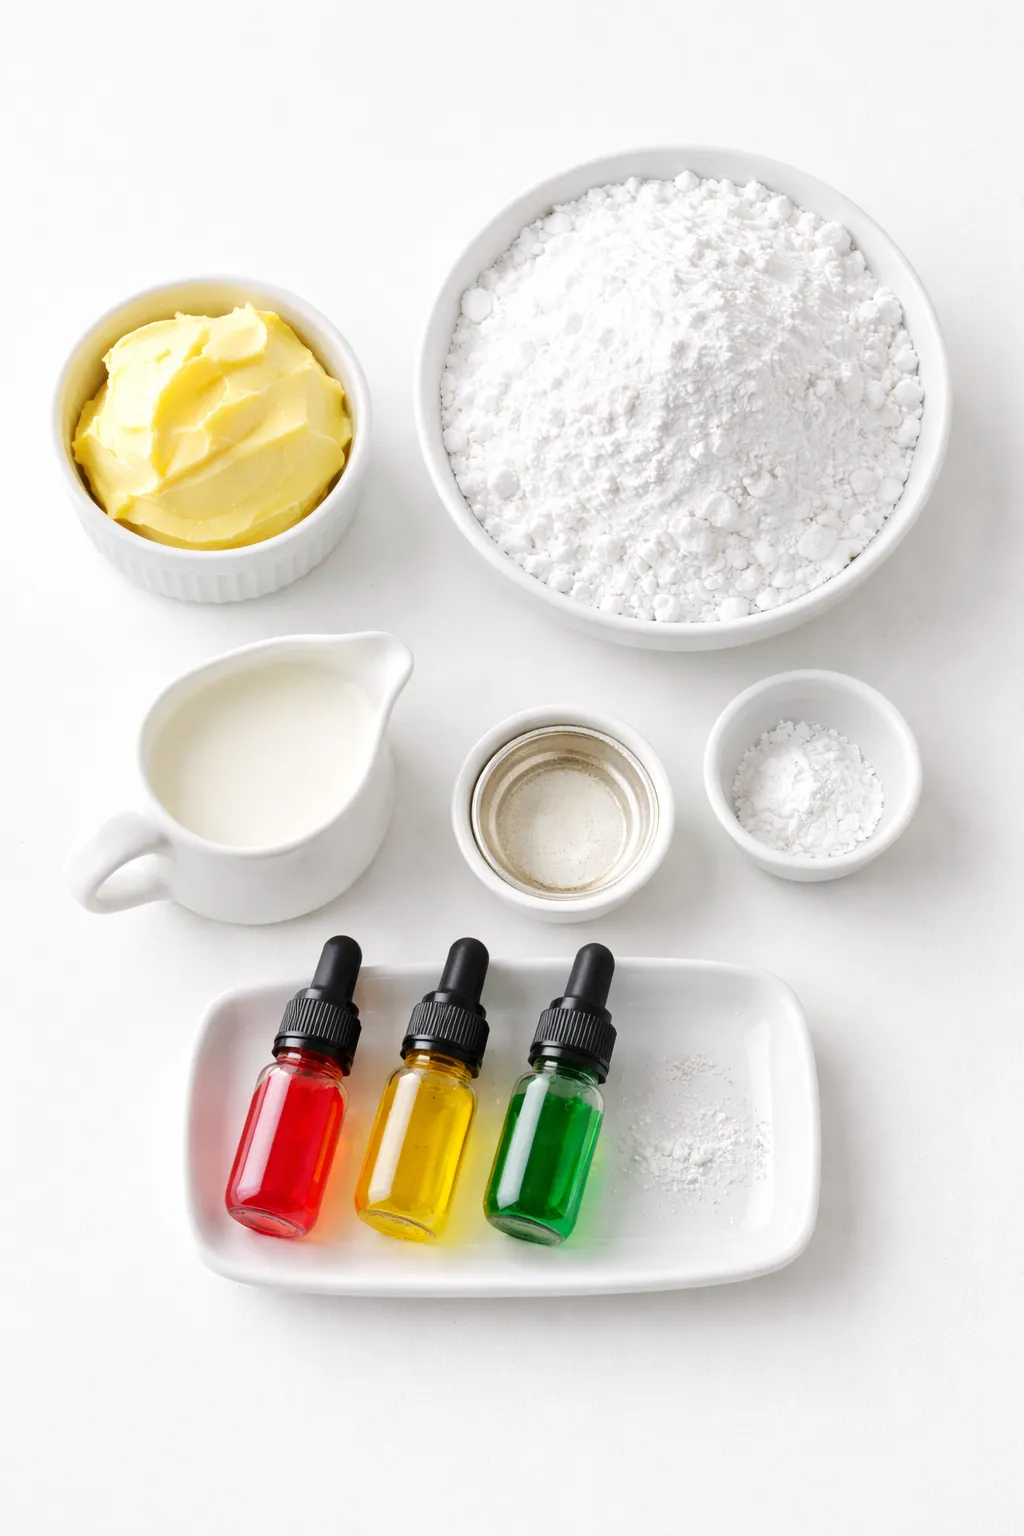
Butter: This is the foundation of the recipe, lending creaminess and structure.
Powdered Sugar: Gives the mints their signature melt-in-your-mouth texture.
Heavy Cream: Adds moisture and richness, helping create that smooth consistency.
Peppermint Extract: For that nostalgic, cool minty flavor. You can substitute or combine with vanilla or almond.
Salt: Just a pinch helps balance the sweetness.
Food Coloring: Optional, but makes these mints visually stunning for themed events.
How To Make the Old-Fashioned Butter Mints
Step 1: Cream the Butter
In a large mixing bowl, beat the softened butter until light and fluffy, about 2-3 minutes. A hand mixer or stand mixer works best here.
Step 2: Add Flavor and Cream
Mix in the peppermint extract, heavy cream, and salt. Beat until fully combined.
Step 3: Incorporate the Sugar
Gradually add powdered sugar, one cup at a time, beating well between each addition. The dough will become thick and dough-like.
Step 4: Tint and Divide
Divide the dough if using multiple colors. Add a drop or two of food coloring to each portion and knead until evenly distributed.
Step 5: Shape the Mints
On a surface lightly dusted with powdered sugar, roll each portion into ropes about 1/2-inch thick. Cut into small squares (about 1/2 inch).
Step 6: Let Them Set
Place the cut mints on a parchment-lined baking sheet. Let them air dry at room temperature for at least 12 hours (preferably overnight) until firm to the touch.
How to Serve These Mints
These Old-Fashioned Butter Mints make 8 dozen pieces, enough to serve 24-30 people depending on portion size. Serve them in candy bowls after dinner, add them to party favors, or use them as edible table decor for weddings and baby showers.
How to Store Old-Fashioned Butter Mints
Once dried, store the mints in an airtight container at room temperature for up to 2 weeks. For longer storage, refrigerate them for up to a month or freeze them for up to 3 months. If frozen, let them come to room temperature in the container to avoid condensation.
Frequently Asked Questions
Can I use a different extract flavor?
Absolutely! Try almond, vanilla, lemon, or even maple for unique spins on this classic candy.
Do I have to let them dry overnight?
Yes, drying ensures that the mints hold their shape and achieve the correct texture.
Can I shape them with molds?
Yes! Press the dough into silicone molds for custom shapes. Just be sure to dust with powdered sugar to prevent sticking.
Why is my dough sticky?
Add more powdered sugar a tablespoon at a time until the dough is firm and pliable.
How long do they stay fresh?
They last up to 2 weeks at room temp, 1 month in the fridge, and 3 months in the freezer.
Want More Candy Ideas?
If you love nostalgic treats like these, you’ll probably enjoy these other delicious recipes:
- Amish Caramel Corn for that buttery crunch you can’t stop munching.
- Pumpkin Pie Cheesecake Truffles for creamy fall-flavored bites.
- Mint Oreo Truffles for a minty chocolate punch.
- Peanut Butter Buckeye Balls for peanut butter lovers.
- Christmas Cookie Lasagna for a layered dessert fantasy.
Save This Pin For Later
📌 Save this recipe to your Pinterest candy board so you can come back to it any time: Mad For Meals Pinterest
And let me know in the comments how yours turned out. Did you try different flavors or colors? Did you use molds or go classic with squares?
I love seeing your variations—let’s help each other keep the butter mint love alive!
Print Old-Fashioned Butter Mints
- Total Time: 20 minutes
- Yield: 96 mints
- Diet: Vegetarian
Description
These Old-Fashioned Butter Mints are a nostalgic, creamy treat that melts in your mouth and brings instant joy. With a pastel finish and soft texture, they’re perfect for holidays, baby showers, wedding favors, or just a quick after-dinner sweet. This easy recipe requires no cooking, no fancy tools, and just a few pantry staples to create the perfect butter mint candies. Ideal for make-ahead events and edible gifting, these buttery mints are one of the easiest homemade candy ideas you’ll ever try. A wonderful addition to your dessert table, these easy recipes also double as holiday snacks or baby shower desserts.
Ingredients
1 cup unsalted butter, softened
4 cups powdered sugar
2 tablespoons heavy cream
1 teaspoon peppermint extract
1/8 teaspoon salt
Optional: food coloring, a few drops of each color
Instructions
1. Beat the softened butter in a large bowl until light and fluffy, about 2-3 minutes.
2. Add the peppermint extract, heavy cream, and salt. Beat until fully incorporated.
3. Gradually add the powdered sugar, one cup at a time, mixing well between each addition until a thick dough forms.
4. Divide the dough if using multiple colors. Tint each portion with food coloring and knead until smooth.
5. Roll each dough portion into 1/2-inch thick ropes on a powdered sugar-dusted surface.
6. Cut the ropes into 1/2-inch pieces and transfer to a parchment-lined baking sheet.
7. Let the mints air dry at room temperature for 12 hours or overnight until firm.
Notes
Always let the mints dry fully before storing to maintain texture.
Use gel food coloring for vibrant pastel hues without altering dough consistency.
For non-mint lovers, swap peppermint for almond or vanilla extract.
- Prep Time: 20 minutes
- Cook Time: 0 minutes
- Category: Dessert
- Method: No-Bake
- Cuisine: American
Nutrition
- Serving Size: 4 mints
- Calories: 110
- Sugar: 18g
- Sodium: 5mg
- Fat: 5g
- Saturated Fat: 3g
- Unsaturated Fat: 2g
- Trans Fat: 0g
- Carbohydrates: 19g
- Fiber: 0g
- Protein: 0g
- Cholesterol: 15mg
Keywords: old-fashioned butter mints, homemade mints, party candy, no bake candy