
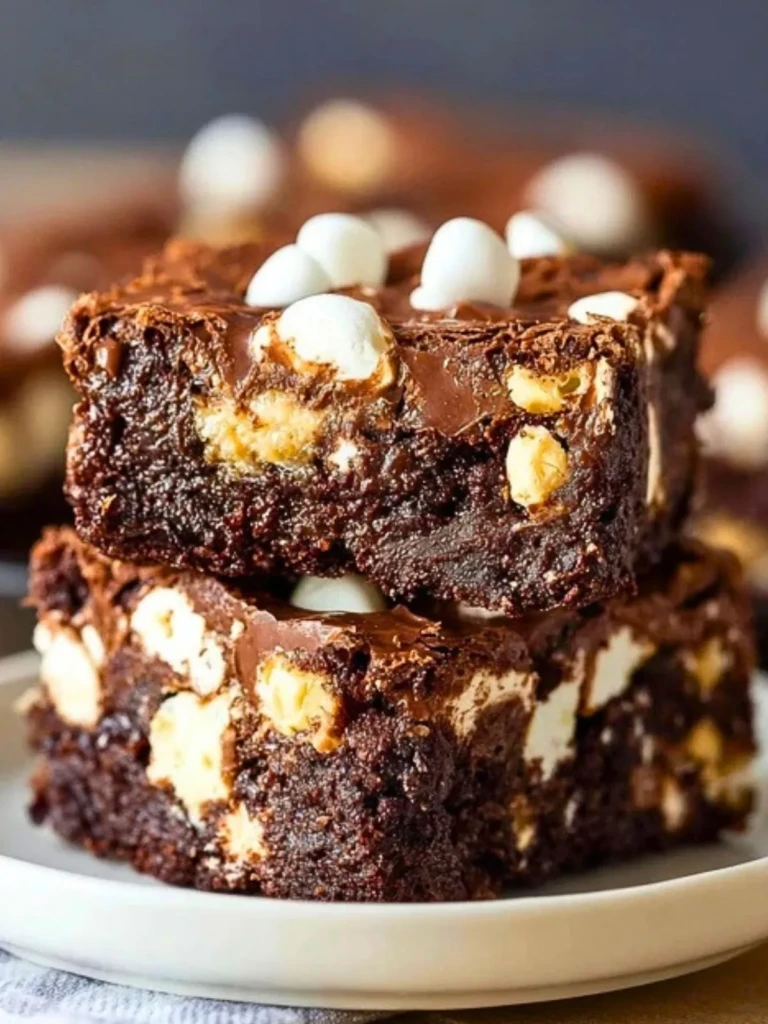
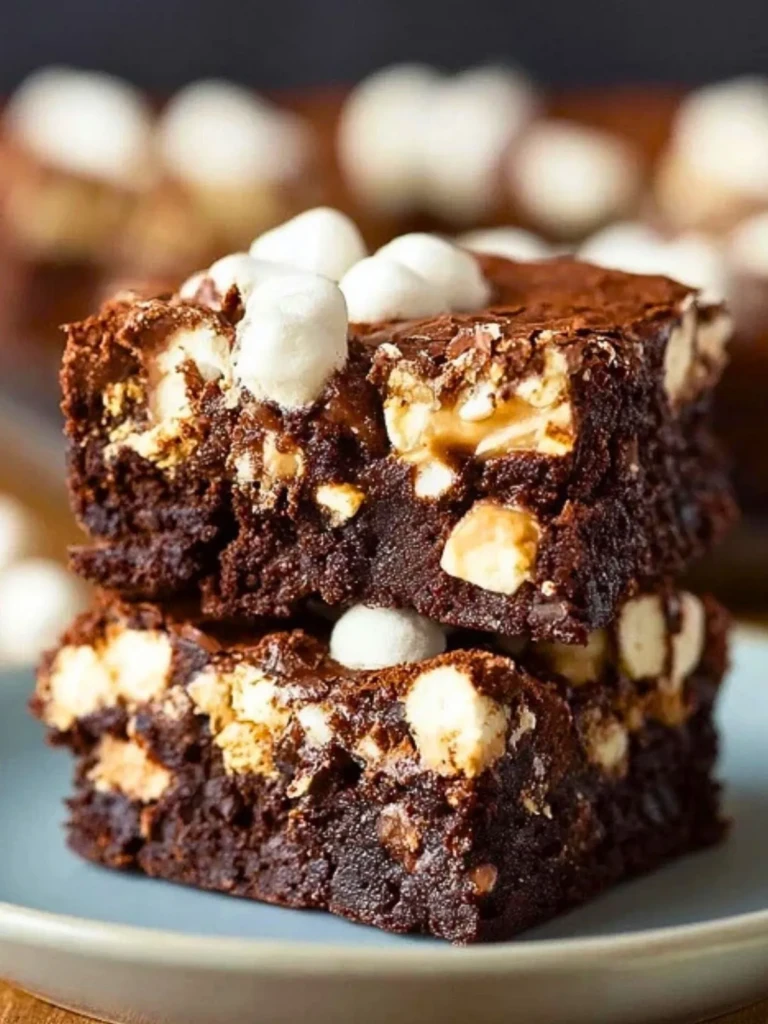
There’s something about Rocky Road Brownies that instantly transports me back to summer campfires and movie nights — but this version? It’s grown-up, deeply fudgy, and architecturally satisfying. You get the softest chocolate crumb base, the gooey pull of half-melted marshmallows, and the satisfying crunch of nuts and candy folded right on top. It’s a dessert bar that doesn’t just look impressive; it delivers every texture and flavor note you want in one bite.
I’ve served these for potlucks, birthday spreads, and yes, even as a cheeky brunch addition. They hold their own in a dessert lineup, always disappearing first from the tray. The key to their success? Balance. The base is deeply chocolaty but not cloying, the toppings are generous but don’t overpower the chew of the brownie beneath.
Here’s what you’re getting: a rich, melt-in-your-mouth brownie with that crinkle-top finish, studded with chunks of toasted walnuts, creamy milk chocolate pieces, and marshmallows that toast just slightly under the broiler. The result is nostalgic, but the execution is pure modern bake science.
“I made your rocky road brownies for our church picnic and people literally followed me around asking for the recipe. My husband called dibs on the last one before we even arrived.”
— Colleen M., Missouri

What Makes This Rocky Road Brownie Stand Out
Most Rocky Road brownies are either too sweet, too soft, or try to hide a weak base under a pile of toppings. This one holds its integrity from top to bottom. The brownie itself is a dense, cocoa-forward base that leans more toward truffle than cake, thanks to a higher fat-to-flour ratio and a slow bake.
That texture becomes the perfect platform for the rocky road layer: gooey mini marshmallows, roasted walnuts for structure and flavor, and a variety of chopped milk chocolate pieces (I’ve tested both Hershey’s and Ghirardelli squares here). The top gets just enough heat to let everything settle together into a mosaic of sugar, crunch, and chew.
Compared to other recipes that either swirl everything into the batter or slap raw toppings on post-bake, this method finishes the brownie 90% before layering on and broiling the toppings — so the base sets fully, and the top melts together without collapsing into a sticky mess.
Skill-wise, this is mid-tier. You don’t need a mixer, but you do need to be precise with the timing and temperature, especially during the broiling step. A metal baking pan (light or dark depending on how chewy you like your edges) and a strong silicone spatula make all the difference here.
Cocoa Powder vs. Melted Chocolate – Which Is Better?
Let’s talk about one of the first decisions you’ll make with any brownie base: cocoa powder or melted chocolate? I’ve used both, and the difference in final texture and flavor is real.
In my notes: Melted chocolate (especially a blend of semisweet and bittersweet) gives you that dense, almost ganache-like center that I love for Rocky Road. Cocoa powder, on the other hand, delivers a drier crumb and a more classic, nostalgic brownie flavor. But when you’re layering marshmallows and chocolate chunks on top, the richer texture from melted chocolate is what anchors everything.
For this recipe, I use both. A base of high-quality melted chocolate forms the structure, while a touch of Dutch-processed cocoa powder deepens the overall flavor. I tested it without the cocoa and found the flavor slightly flat; with only cocoa, it lacked that fudgy body. The combination? Best of both worlds.
Walnuts vs. Pecans – Which Adds More?
There’s no skipping the nuts in rocky road. The question is which one adds the most texture and flavor.
In my notes: Toasted walnuts bring just the right bitterness and crunch to balance the sweetness from the marshmallows and chocolate. Pecans are milder and almost buttery, but in testing, they got a bit lost in the mix. For this recipe, walnuts are non-negotiable. I toast them first at 350°F for 7 minutes and let them cool before folding in. It prevents sogginess and amplifies their earthy bite.
Why I Recommend 6 oz of Bittersweet Chocolate
I’ve tested with everything from 4 to 8 ounces, and 6 ounces hits the ideal midpoint. You get that smooth, rich body without the brownie turning oily or overly soft. I recommend using 60-70% bittersweet chocolate – Guittard and Ghirardelli both performed beautifully in testing. I melt it gently with butter for an even emulsion that blends seamlessly into the sugar and eggs.
Too much chocolate and you’ll lose the structure. Too little and the brownie won’t carry the rocky road toppings without collapsing. Six ounces is your golden ratio.
Use the Right Pan for Best Results
I’ve tested this in glass, ceramic, and metal pans. Metal wins by a long shot. A light aluminum 8×8 pan gives the best balance of chewy edges and a soft center. Glass takes too long to heat, and ceramic holds onto heat too long — both increase the risk of overbaking the edges before the middle sets.
If you like extra chewy edges, go with a dark metal pan but reduce the baking time slightly. Line it with parchment for a clean lift, and don’t skip the preheat. Your oven should hit a solid 325°F before the batter goes in.
Marshmallows: Essential, Toasted, and Never Skipped
Marshmallows make the rocky road. I’ve tried the recipe without them once. Never again. You lose the gooey contrast that makes each bite dynamic.
Here’s what works: Use mini marshmallows, scatter them only in the final 5 minutes of baking, then broil briefly for that toasty top. Adding them too early melts them into the batter, and they disappear. Too late and they won’t integrate. Timing is everything here. Watch for bubbling and golden edges, then pull it immediately.
How to Bake for a Fudgy Center and Toasted Top
Start with a light metal 8×8 pan lined with parchment. Preheat your oven to 325°F — no shortcuts here. I recommend a digital thermometer to confirm the temperature is true. Melt your chocolate and butter slowly over a double boiler or in short microwave bursts, then whisk in sugar, eggs, and cocoa until glossy.
Bake the base for 26 to 28 minutes until the edges are set and a toothpick comes out with moist crumbs, not wet batter. Remove from the oven, scatter your marshmallows, nuts, and chopped chocolate on top, and return under the broiler for 30 to 60 seconds.
Here’s the visual cue: marshmallows puffed and just starting to brown, chocolate looking glossy but not melted through. Let the pan cool for at least 30 minutes before slicing. The residual heat finishes the center without drying it out. Cutting too early ruins the texture and your presentation.
Skip cooling, and you’ll get molten squares that fall apart. Cool it too long in the pan and the edges overcook. Set a timer — 30 minutes is your sweet spot.
How Long It Lasts and How to Store This Rocky Road Brownie
These brownies taste best the day they’re made, but they hold up well for three days at room temperature. I store them in an airtight glass container with parchment between layers to prevent sticking. Plastic can create moisture buildup, which softens the marshmallows too much.
For serving, I prefer them at room temp. That’s when the fudgy center and toppings are at their peak texture. If you chill them, let them sit out for 20 minutes before serving. Reheating? A 5-second microwave blast is all they need.
They also freeze beautifully. Wrap each square individually in plastic wrap, then place in a zip-top freezer bag. To thaw, just leave at room temperature for an hour. The marshmallows will be a little softer, but the flavor holds.
Other Brownies I Bake Just As Often
If you love these, don’t miss my Triple Chocolate Espresso Brownies – they’re punchy, rich, and absolutely crave-worthy. My Salted Caramel Swirl Brownies use a ripple technique I’ve perfected over time. For a crowd, my Sheet Pan Cream Cheese Brownies offer clean layers and dramatic visuals. And when I want something nostalgic, my Classic Fudge Brownies (no toppings, pure cocoa) always win hearts.
Pin This Recipe and Come Back to It Anytime
I’ve saved this one on my Pinterest board “Bake Sale Winners,” and readers have told me it’s become their go-to for birthdays and potlucks. Have you tried swapping in dark chocolate chips or using almonds instead? Let me know.
Tag your version with #RockyRoadByMe — I love seeing the twists you all come up with.
Equipment Notes That Make a Difference
Parchment Paper: Guarantees clean lifts and no sticking in the corners.
Digital Oven Thermometer: Crucial for accuracy, especially with brownies where a few degrees matter.
Offset Spatula: Makes spreading the batter smooth and even, especially around the edges where drag can create uneven baking.
Print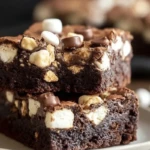
Rocky Road Brownies
- Total Time: 43 minutes
- Yield: 16 brownies
- Diet: Vegetarian
Description
Fudgy, chewy, and packed with toasted walnuts, mini marshmallows, and melted chocolate chunks, these Rocky Road Brownies are the ultimate upgraded campfire classic. A dense chocolate base supports a gooey, crunchy topping layer for the perfect bite every time.
Ingredients
6 oz bittersweet chocolate (60–70%), chopped
10 tbsp unsalted butter
1 cup granulated sugar
2 large eggs
1 tsp vanilla extract
1/4 cup Dutch-processed cocoa powder
2/3 cup all-purpose flour
1/4 tsp kosher salt
3/4 cup toasted walnuts, roughly chopped
3/4 cup mini marshmallows
1/2 cup chopped milk chocolate or chocolate chips
Instructions
1. Preheat the oven to 325°F. Line an 8×8 light metal baking pan with parchment paper.
2. Melt the bittersweet chocolate and butter together in a microwave-safe bowl or double boiler until smooth.
3. Whisk in the sugar, then add the eggs and vanilla, mixing until glossy.
4. Sift in the cocoa powder, flour, and salt. Stir with a spatula until just combined.
5. Pour the batter into the prepared pan and smooth the top.
6. Bake for 26 to 28 minutes until the edges are set and a toothpick inserted comes out with moist crumbs.
7. Remove from oven and quickly scatter marshmallows, toasted walnuts, and milk chocolate on top.
8. Place under a broiler for 30 to 60 seconds, watching carefully, until the marshmallows begin to brown.
9. Cool in the pan on a wire rack for exactly 30 minutes before slicing.
10. Lift out using the parchment and cut into squares. Serve at room temperature.
Notes
Do not overmix the batter after adding flour to preserve fudgy texture.
Use parchment paper to easily lift brownies from the pan after cooling.
Broil only until marshmallows are golden; they will continue to melt slightly as the brownies cool.
- Prep Time: 15 minutes
- Cook Time: 28 minutes
- Category: Dessert
- Method: Baking
- Cuisine: American
Nutrition
- Serving Size: 1 brownie
- Calories: 230
- Sugar: 18g
- Sodium: 85mg
- Fat: 14g
- Saturated Fat: 7g
- Unsaturated Fat: 5g
- Trans Fat: 0g
- Carbohydrates: 25g
- Fiber: 2g
- Protein: 3g
- Cholesterol: 40mg
Keywords: rocky road brownies, fudgy brownies, marshmallow brownies