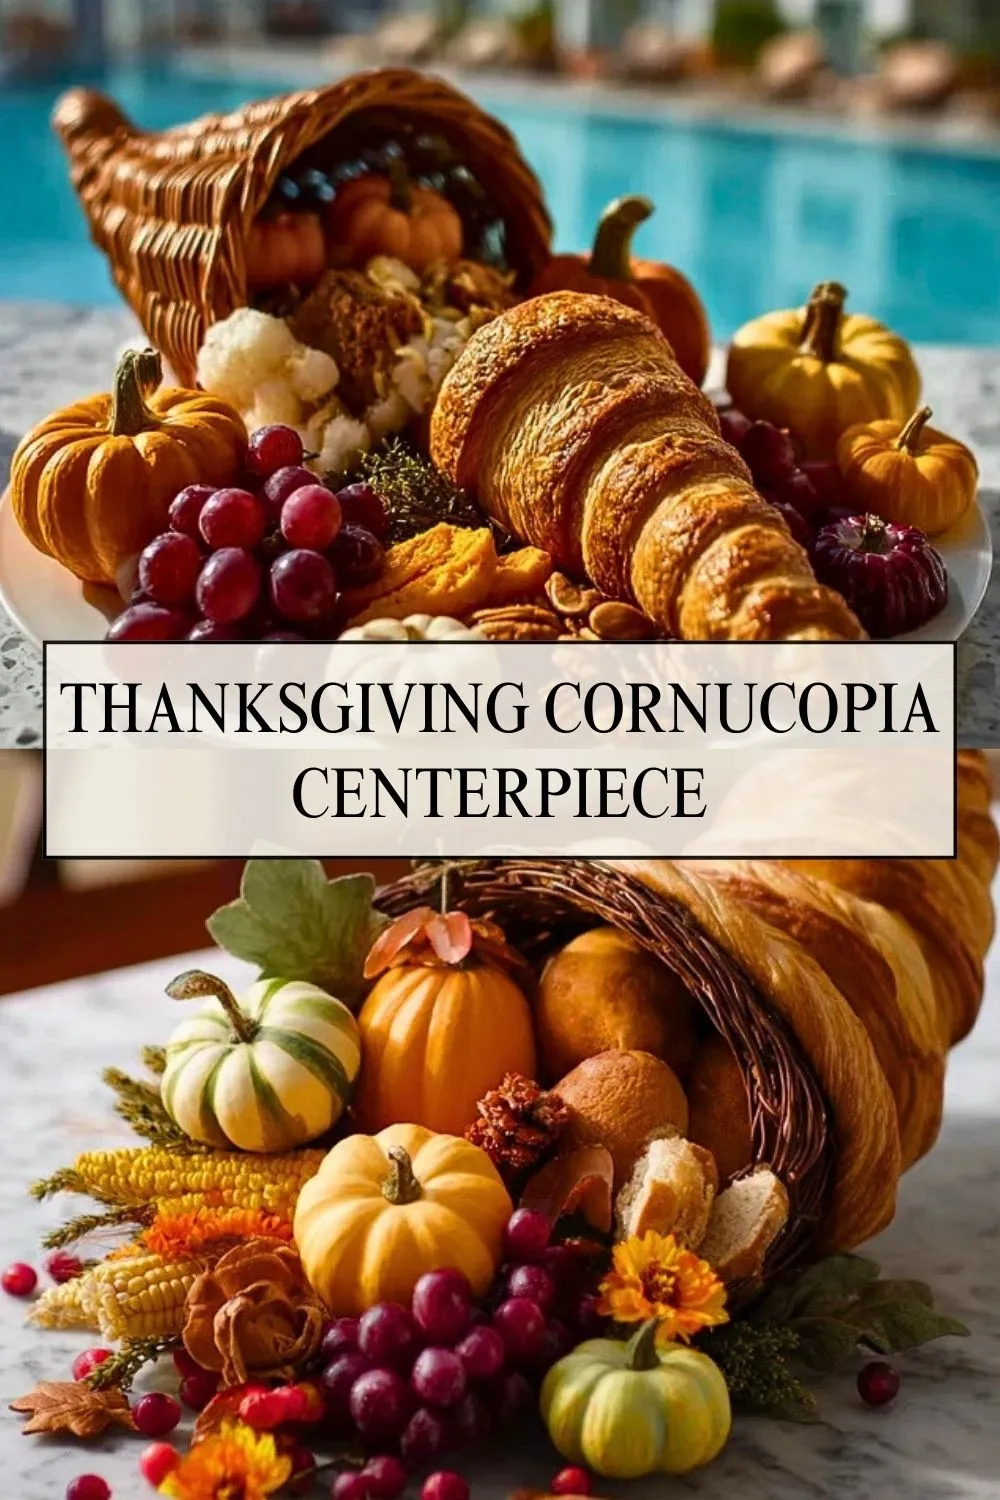
A Thanksgiving table instantly feels more magical when a golden, flaky cornucopia spills over with jewel-toned grapes, tiny pumpkins, glossy apples, and crunchy nuts. This centerpiece looks like it walked straight off a magazine cover, but you can absolutely pull it off at home with simple ingredients and a little bit of creativity.

Think of it as an edible centerpiece meets grazing board: guests can nibble on fresh fruit, crackers, and nuts while they admire the horn of plenty made from puff pastry or croissant dough. It’s a fun way to celebrate the season of abundance and add a memorable focal point to your holiday spread.
Why You’ll Love This Thanksgiving Cornucopia Centerpiece
This Thanksgiving Cornucopia Centerpiece is more than just decor—it’s an interactive, edible display that sets the tone for the whole meal. You’ll love how it brings color, texture, and flavor to the table without needing any advanced decorating skills.
- It doubles as a snack board and centerpiece, saving you time and space.
- Puff pastry or croissant dough bakes up into a buttery, flaky horn that tastes as good as it looks.
- Fresh fruit, nuts, and crackers keep things light before or after a heavy meal.
- You can customize the colors and ingredients to match your menu and style.
- It’s a perfect make-ahead project: bake the shell earlier, then fill right before serving.
What Can I Use to Build a Thanksgiving Cornucopia Centerpiece?
You don’t need a specialty mold to make this showpiece. A simple foil-and-parchment cone, a sheet of puff pastry, and a sturdy platter are the foundation for this entire project.
You can build the horn itself out of refrigerated puff pastry or croissant dough, which bakes into a golden, layered shell. For extra support, especially if you’re transporting the centerpiece, you can place the baked horn inside a woven basket cornucopia and let the pastry peek out over the rim.
For the filling, think of anything that feels like fall harvest: grapes, apples, pears, figs, mini pumpkins, nuts, crackers, dried fruit, and a few sprigs of herbs or flowers. Mixing shapes and colors is what makes the whole display feel abundant and lush.
Ingredients for the Thanksgiving Cornucopia Centerpiece
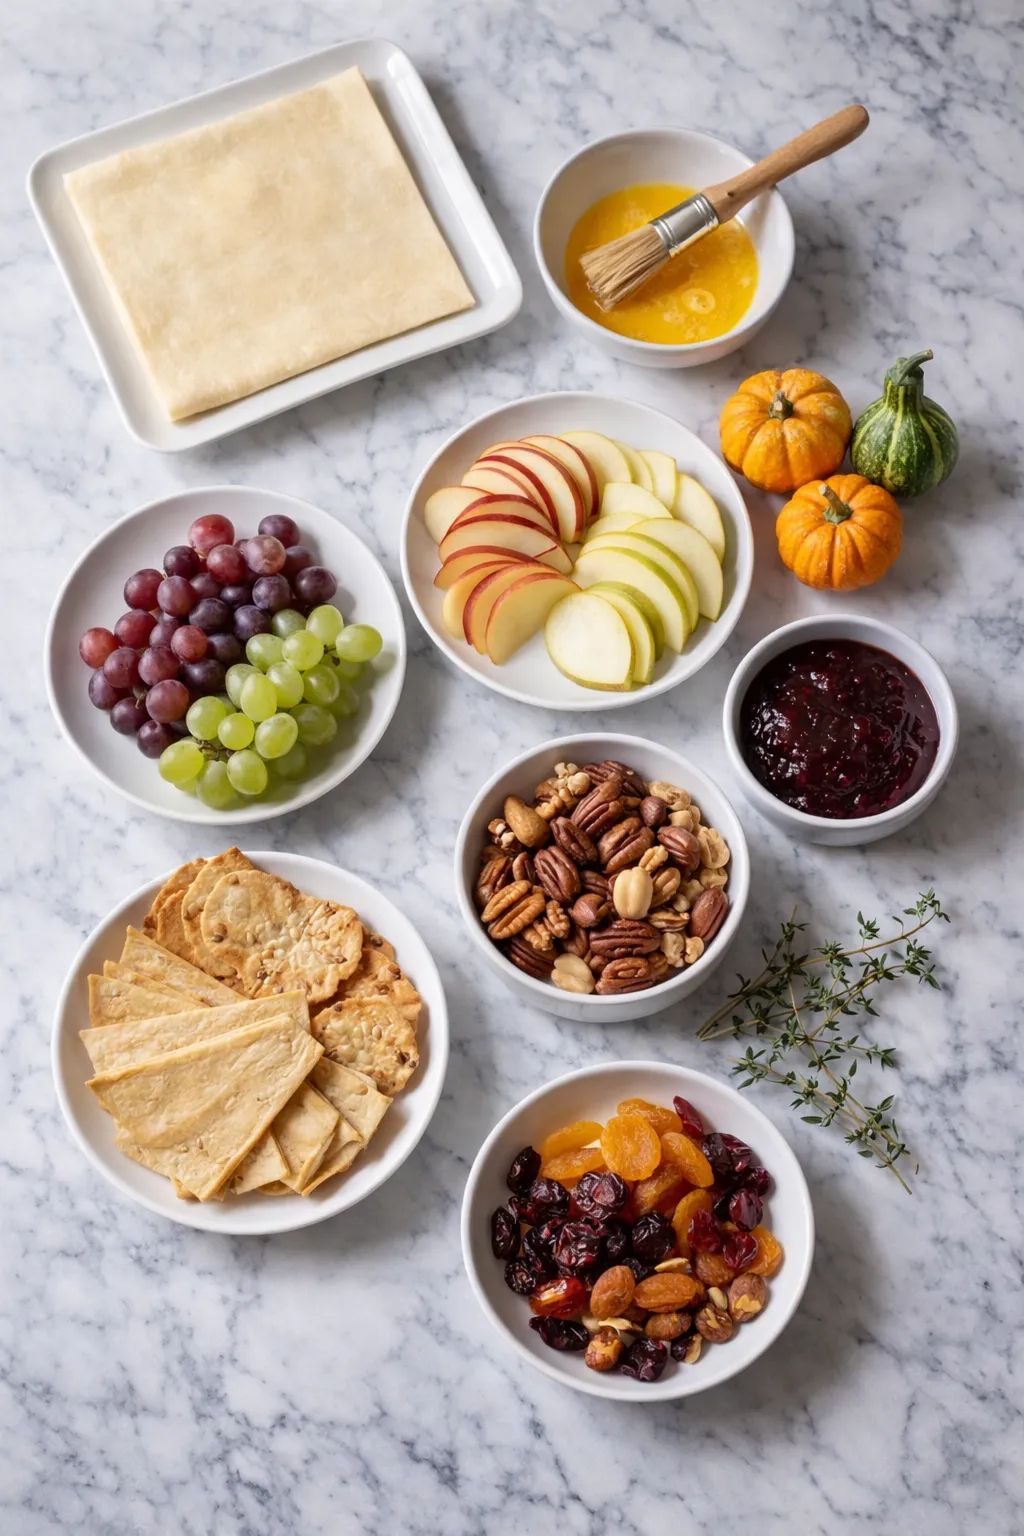
Before you start shaping and baking, gather everything you’ll want for the horn and the edible “spill” flowing out across your platter. You won’t need exact measurements here—just a nice variety so the cornucopia looks full and inviting.
- Puff pastry or refrigerated croissant dough – Forms the flaky, golden shell of the cornucopia and holds all of your colorful fillings.
- Aluminum foil and parchment paper – Help you create a cone-shaped mold that supports the pastry while it bakes.
- Egg wash (egg beaten with a splash of water) – Brushed over the dough so the horn bakes up shiny and deep golden.
- Seedless grapes (red and green) – Add juicy sweetness and a mix of colors that tumble beautifully out of the horn.
- Apples and pears – Bring crisp texture and classic fall flavor, especially when sliced and fanned around the base.
- Mini pumpkins or gourds – Add height, texture, and an unmistakable Thanksgiving vibe (they can be decorative rather than edible).
- Assorted nuts (pecans, walnuts, almonds) – Offer crunch and warm, toasty flavor to balance the fresh fruit.
- Crackers or sliced baguette – Turn the centerpiece into a mini grazing board; guests can pair them with fruit and jam.
- Dried fruit (such as apricots or cranberries) – Tuck into gaps for extra pops of color and chew.
- Fresh herbs or edible flowers – Sprigs of rosemary, thyme, or small edible blossoms fill in spaces and make the arrangement feel lush and finished.
- Jam or honey – Served on the side or in a tiny dish near the horn so guests can drizzle over fruit and crackers.
How To Make the Thanksgiving Cornucopia Centerpiece
Once your ingredients are ready, the rest is all about shaping, baking, and arranging. Take your time with the horn and let your inner stylist take over when it’s time to fill and decorate.
Step 1: Build the Cornucopia Mold
Tear off several sheets of aluminum foil and crumple them together into a sturdy cone about 10–12 inches long, with a slightly curved tip to mimic a horn. Wrap the foil cone tightly in parchment paper so the pastry doesn’t stick, and place it on a parchment-lined baking sheet.
If you have a woven cornucopia basket, you can also shape the foil to fit just inside it—this helps the baked horn sit snugly later on.
Step 2: Wrap the Pastry Horn
Unroll your puff pastry or croissant dough on a lightly floured surface and cut it into long strips. Starting at the narrow tip of the parchment-wrapped cone, wrap the strips around the mold, slightly overlapping each piece so there are no gaps. Keep wrapping until the cone is completely covered and the base is a little wider for stability.
Brush the entire pastry horn with egg wash so it bakes up glossy and golden.
Step 3: Bake Until Golden and Crisp
Bake the horn in a preheated oven according to your pastry package directions (typically around 375°F/190°C) until it is puffed, crisp, and deep golden brown. This usually takes about 18–22 minutes, depending on your oven.
Let the horn cool completely on the baking sheet. Once it’s cool, gently twist and tug the foil-and-parchment cone out from the inside, leaving the hollow pastry shell intact.
Step 4: Position the Horn on a Platter
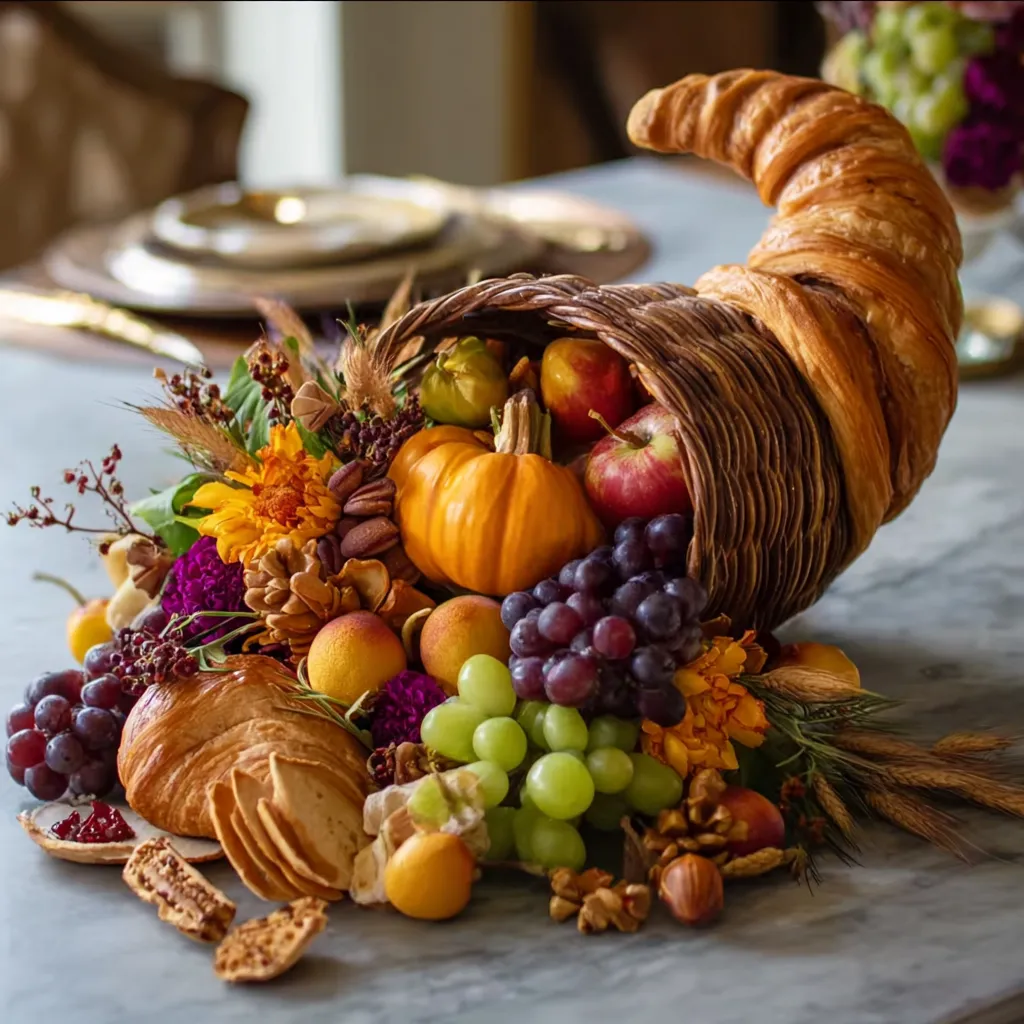
Choose a large platter, wooden board, or even the center of your table as the stage for your centerpiece. Place the pastry cornucopia on its side with the opening facing slightly downward so the fruit and snacks can spill out naturally.
If you’re using a basket cornucopia, nestle the pastry horn inside, letting some of the flaky edges peek over the rim.
Step 5: Fill and Style the Cornucopia
Start by tucking a few larger pieces—mini pumpkins, apples, and pears—around the opening of the horn. Then add clusters of grapes inside the horn and spilling out onto the platter.
Fill in gaps with crackers, nuts, and dried fruit, letting them cascade outward like a river of snacks. Finish by tucking in sprigs of fresh herbs or edible flowers for movement and color.
Step 6: Finish With Little Extras
Set a small dish of jam or honey near the cornucopia so guests can pair it with the fruit and crackers. Step back and make any final tweaks—add a few more grapes here, another sprig of rosemary there—until the whole display feels balanced and abundant.
How to Serve This Thanksgiving Cornucopia Centerpiece
This Thanksgiving Cornucopia Centerpiece is designed to be shared. Place it in the center of your table or on a sideboard where guests can comfortably reach from all sides. It works wonderfully as a pre-dinner snack board, a light dessert option, or a grazing station while everyone waits for coffee and pie.
As built, this centerpiece comfortably feeds about 8–10 people as a light nibble, especially if you pair it with other appetizers. For larger gatherings, simply scale up the fruit, crackers, and nuts around the horn so there’s plenty for everyone.
Encourage guests to pull off pieces of the pastry horn, scoop up fruit and nuts, and build their own little bites. The more interactive it feels, the more memorable it becomes.
How to Store This Thanksgiving Cornucopia Centerpiece
Because this centerpiece uses both baked pastry and fresh produce, storing it properly keeps everything tasting fresh and safe.
If you’re making the pastry horn ahead of time, bake it earlier in the day or up to one day in advance. Once completely cool, store it in an airtight container or wrap it loosely in foil at room temperature so it stays crisp. Avoid refrigerating the empty pastry, as that can make it soggy.
Once the horn is filled with fruit and snacks, it’s best enjoyed within 2–3 hours. After your gathering, separate the components: transfer leftover fruit to airtight containers and refrigerate for up to 2–3 days, and store nuts and crackers in sealed bags or jars at room temperature.
Any pieces of pastry that are still crisp can be stored in an airtight container at room temperature for a day, though they’re at their best on the day they’re baked. Decorative mini pumpkins and gourds can be wiped off and reused as decor for the rest of the season.
Frequently Asked Questions
Can I make the cornucopia horn ahead of time?
Yes, you can bake the pastry horn up to a day in advance. Let it cool completely, then store it in an airtight container or loosely wrapped in foil at room temperature. Wait to fill it with fruit and snacks until just before serving so the pastry stays crisp.
What if I don’t have puff pastry?
Refrigerated croissant dough or crescent roll dough works beautifully and gives you the same flaky, layered effect. In a pinch, you can even use strips of refrigerated pizza dough for a more rustic, bread-like horn.
Is the entire centerpiece edible?
Most of it can be! The pastry horn, fruit, nuts, crackers, and dried fruit are all meant to be eaten. Mini pumpkins and some decorative elements like gourds or certain flowers may be purely for looks, so let guests know which parts are just decor.
How can I make this centerpiece more savory?
Along with the fruit and nuts, add cubes of cheese, slices of salami or prosciutto, and olives around the platter. Think of it as a charcuterie board flowing out of a pastry horn. Just remember to refrigerate any meats and cheeses promptly after serving.
What size platter do I need?
A large rectangular board, a wide round platter, or even a clean baking sheet lined with parchment all work well. Aim for a surface that’s at least a few inches wider than your cornucopia on all sides so the fruit and snacks have room to spill out and create that abundant effect.
Want More Thanksgiving Recipe Ideas?
If this edible Thanksgiving Cornucopia Centerpiece has you excited for all things cozy and seasonal, you’ll probably love these other festive dishes from Mad For Meals:
- Brighten your table with a colorful Roasted Beets and Carrots with Burrata Salad that pairs earthy roots with creamy cheese.
- Add classic comfort with Mama’s Cornbread Dressing for a buttery, herb-filled side everyone expects on Thanksgiving.
- Bring extra sweetness to the spread with Pumpkin Sugar Cookies Soft Cookies Topped with Cream Cheese Frosting for dessert or coffee time.
- Round out the menu with Creamy Corn Casserole—a spoonable, ultra-comforting bake that’s a natural partner for turkey and ham.
Save This Pin For Later
📌 Save this Thanksgiving Cornucopia Centerpiece to your holiday or dessert board on Pinterest so you can come back to it whenever you start planning your next feast.
Once you’ve made it, let me know how yours turned out. Did you keep it all fruit and nuts, or did you sneak in cheeses and meats too? Did you use puff pastry or croissant dough for your horn?
I love hearing how you make these ideas your own. Questions are always welcome—let’s help each other create Thanksgiving tables that feel warm, welcoming, and delicious. And for even more everyday and holiday inspiration, follow my Mad For Meals Pinterest recipes where I share new food ideas and festive boards all season long.
Thanksgiving Cornucopia Centerpiece
- Total Time: 50
- Yield: 10 servings
- Diet: Vegetarian
Description
This Thanksgiving Cornucopia Centerpiece is an easy recipe that turns golden puff pastry, fresh fruit, nuts, crackers, and mini pumpkins into an edible horn of plenty that doubles as show-stopping table decor. It works as a festive holiday snack board before the big meal, adds to your Thanksgiving dinner ideas, and gives you fun food ideas for entertaining when you want something beautiful, simple to assemble, and full of cozy seasonal flavor.
Ingredients
1 sheet refrigerated puff pastry or croissant dough
1 large egg, beaten with 1 tablespoon water
2 small apples, sliced
2 small pears, sliced
1 cup red seedless grapes
1 cup green seedless grapes
1 cup assorted crackers
1 cup mixed nuts (pecans, almonds, walnuts)
1/2 cup dried fruit such as apricots or cranberries
2 to 3 mini decorative pumpkins or gourds
2 to 3 sprigs fresh rosemary or thyme
1/4 cup jam or fruit spread for serving
Instructions
1. Heat the oven to 375°F (190°C) and line a baking sheet with parchment paper.
2. Crumple aluminum foil into a sturdy cone about 10 to 12 inches long, curve it slightly like a horn, wrap it in parchment paper, and place it on the prepared baking sheet.
3. Unroll the puff pastry or croissant dough, cut it into long strips, and wrap the strips around the parchment-covered cone, slightly overlapping so there are no gaps.
4. Brush the pastry all over with the beaten egg wash, then bake for 18 to 22 minutes or until the horn is puffed, crisp, and deep golden brown.
5. Let the horn cool completely on the pan, then gently remove the foil and parchment from inside so you are left with a hollow pastry shell.
6. Transfer the pastry cornucopia to a large platter or board, positioning it on its side with the opening angled slightly downward.
7. Arrange mini pumpkins, apples, and pears around the opening, then tuck clusters of red and green grapes inside the horn and spilling out onto the platter.
8. Fill gaps with crackers, mixed nuts, and dried fruit, letting them cascade outward to create a full, abundant look.
9. Tuck in sprigs of fresh rosemary or thyme for color and fragrance, and place a small dish of jam or fruit spread nearby for serving.
10. Serve the centerpiece within a few hours of assembling, encouraging guests to break off pieces of pastry and enjoy it with the fruit, nuts, crackers, and jam.
Notes
For the crispiest texture, bake the pastry horn earlier in the day and wait to fill it with fruit and snacks until just before serving.
To feed a larger crowd, simply add extra crackers, grapes, and nuts around the outside of the horn to stretch the centerpiece further.
You can easily customize this centerpiece by adding cheeses and cured meats for a more savory charcuterie-style display or swapping in your favorite seasonal fruits.
- Prep Time: 30
- Cook Time: 20
- Category: Appetizer, Holiday
- Method: Baking
- Cuisine: American
Nutrition
- Serving Size: 1/10 of recipe
- Calories: 280
- Sugar: 20
- Sodium: 210
- Fat: 11
- Saturated Fat: 5
- Unsaturated Fat: 4
- Trans Fat: 0
- Carbohydrates: 40
- Fiber: 3
- Protein: 6
- Cholesterol: 20
Keywords: Thanksgiving centerpiece, edible cornucopia, holiday appetizer, easy recipe, food ideas, dinner ideas